A Step-by-Step Guide to Connect Excel to Snowflake
- Jeffrey Agadumo
- March 10, 2023
This article will guide you through the steps to connect Excel to Snowflake and get you on your way to becoming a data analytics pro.
Snowflake is a cloud-based data warehousing platform for complex, large-scale data management and analysis. Excel, on the other hand, is a popular spreadsheet program used for organizing, manipulating, and analyzing data.
Establishing a connection between the two platforms allows you to quickly and easily access, analyze, and display data stored in Snowflake, all from within the Excel interface.
Connecting Excel to Snowflake eliminates the need for organizations to manually export data from Snowflake and import it into Excel, which can be especially helpful for companies that rely on Excel for data analysis and reporting.
This streamlined integration makes it easier to work with large volumes of data and extract meaningful insights without switching between different platforms or tools.
Getting Started
Before you can establish a connection between Snowflake and Excel, there are a couple of requirements that you would need to ensure an error-free integration between the two platforms. Such requirements are:
- A Snowflake account with access to its web interface.
- Microsoft Excel (compatible version).
- An ODBC driver that is compatible with your version of Excel.
- A Windows or Mac operating system.
But First…. Datameer Snowflake: An Error-Free Integration
By connecting Snowflake and Excel, analysts gain a powerful tool to access, analyze, and visualize their Snowflake data in the familiar environment of Excel. However, the process can present roadblocks and challenges that can slow down analysis.
Datameer, however, is an analysis and transformation tool built on top of the Snowflake platform and integrates seamlessly with it for an unforgettable analytics experience.
Here are some of the features of Datameer that make it an ideal tool for analyzing and transforming Snowflake data:
- Easy File Upload to Datameer: Users can upload files directly into Datameer, which then become available as datasets within the platform. This process is user-friendly and intuitive, involving simple steps like dragging and dropping the file or clicking to add the file. This makes it easy for Excel users to start their data integration journey.
- Direct Drag-and-Drop into Snowflake: Datameer simplifies the data upload process to Snowflake by allowing users to drag and drop their files (like Excel, Google Sheets) directly into Snowflake through Datameer’s interface. This eliminates the need for complex SQL commands or other technical procedures, making it very user-friendly for Excel users.
- Data Preparation with Datameer: After the data is uploaded to Snowflake, Datameer offers several features to tidy up and prepare the data for analysis. These include:
- Search and Data Catalog: Helps users swiftly discover relevant datasets for their projects. The data catalog is equipped with documentation, lineage, and custom metadata, simplifying locating the right data for analysis.
- Data Profiling: Allows thorough exploration and assessment of the dataset within Snowflake, identifying and addressing potential data quality issues.
- Built-in and Custom Transformations: Provides pre-built drag-and-drop transformations for easy data cleaning and standard operations, or customization with SQL for specific data requirements, without complex coding.
- AI-powered User Experience: Enhances data analysis using AI technologies, offering AI-generated recommendations and transformations for faster data preparation and converting natural language into SQL queries.
- Open AI Integration for Documentation: Automatically documents projects, capturing all steps taken during data cleaning and transformation, supporting effective data governance and collaboration.
For any analysis or transformation task that needs to be performed on your Snowflake data, Datameer has covered it, updating all changes made to the data in real-time and providing no code alternatives for executing SQL queries.
Give the FREE 14 DAYS TRIAL a shot today, and thank me later! 😉
Setting up the Snowflake-Excel Handshake
This process is divided into phases; You must complete each one to move on to the next. The phases discussed are:
- Verify access to your Snowflake account.
- Set up the Snowflake ODBC driver.
- Set up a Snowflake Data Source Name (DSN).
- Connect Excel to Snowflake
- Query Snowflake Data in Excel
1. Verify Access to your Snowflake Account
If you do not already have access to a Snowflake account, you can sign up now and get one set up in minutes.
Once signed in, a welcome message will be sent to your mail – inputted at sign up, containing your username and account/server URL, which will be required further in the connection process – so you might want to write it down.
2. Set up the Snowflake ODBC driver.
After verifying your Snowflake account, you will need to download and install an ODBC driver on your operating system. This driver bridges applications like Excel and database management systems (DBMS) like Snowflake that use SQL as a standard for data interaction.
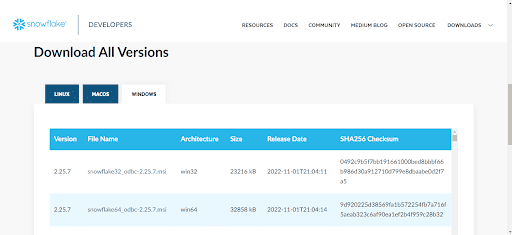
- Download a version of the Snowflake ODBC driver that is compatible with your OS and system architecture.
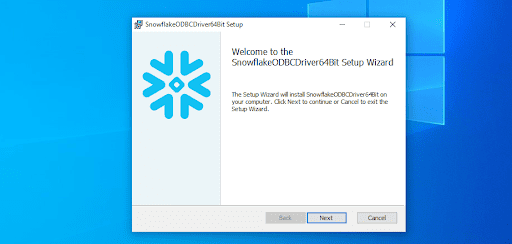
- When the download is complete, install the driver by following the instructions provided in the installation wizard.
- Next, search for ‘ODBC Data Sources’ in your windows search bar and select the option compatible with your – 32/64 bit – architecture.

Once the installation is complete and the ODBC interface is open, it is time to add Snowflake as a user DSN.
3. Set up a Snowflake Data Source Name (DSN)
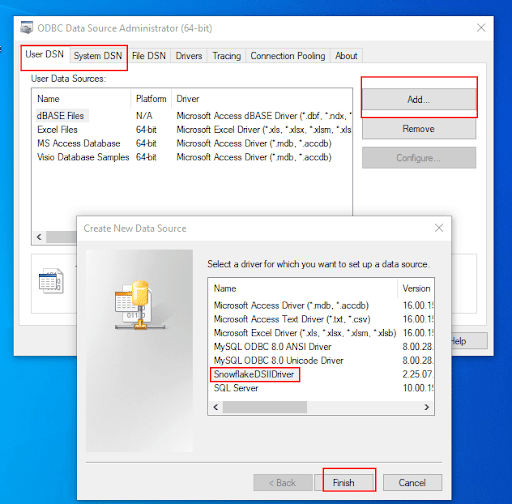
- The first step in this phase is to confirm that Snowflake is listed in the ‘drivers’ tab of the ODBC interfac e.

- To proceed, navigate to the ‘user DSN’ tab and click the ‘Add’ button to add the Snowflake driver to the DSN. After selecting the driver, click ‘Finish’ to complete the process.
- Once you initiate the process, a dialog box on your screen will prompt you to provide specific information about your Snowflake account. The required fields in this dialogue include the following:
- Data Source: This is the name you wish to assign to the DSN.
- User: Enter your Snowflake username here.
- Password: Enter your Snowflake Password here
- Server: This is the account URL that identifies your account. It is included in the Snowflake welcome message sent to your inbox. It usually maintains a format of <account_identifier>.snowflakecomputing.com. An example is myaccount.us-east-1.snowflakecomputing.com.
Can’t find it? You can read more about Snowflake account identifiers to help you out. - Warehouse: The warehouse your Snowflake account where that you want to access, usually COMPUTE_WH.
- Role: The user role you want to access the data with, preferably “ ACCOUNTADMIN.”
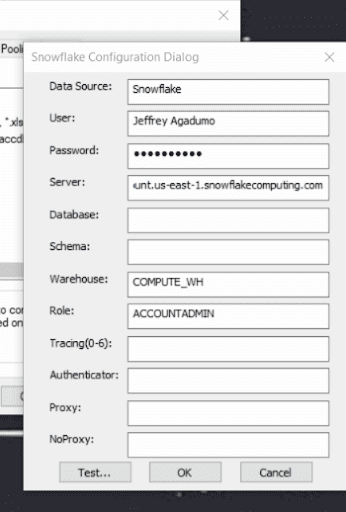
After inputting your Snowflake credentials, click on the ‘Test’ button to verify that the data source has been configured correctly, then click the ‘OK’ button, and your ‘SnowflakDSIIDriver’ should be listed as a user DSN.
4. Connect Excel To Snowflake
Using the correct version of Excel is crucial to establish a smooth integration with Snowflake. I recommend you use Excel 2019 or a newer version to ensure compatibility. At the time of writing this article, I am using Microsoft Office LTSC Professional Plus 2021, version 2301 (Build 16026.20200).
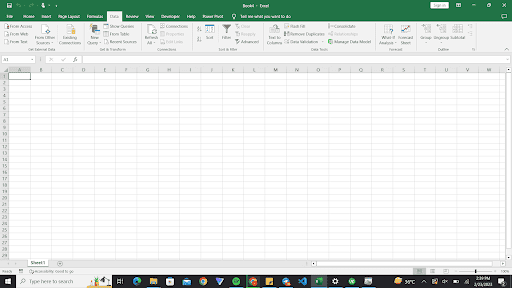
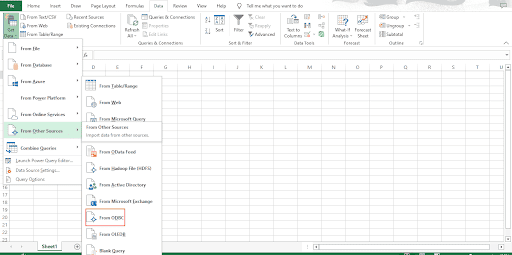
- Open up Excel and click the ‘Data’ tab in the ribbon.
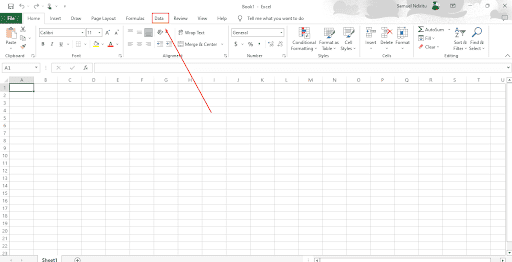
- Click on the dropdown arrow for the ‘Get Data’ section.
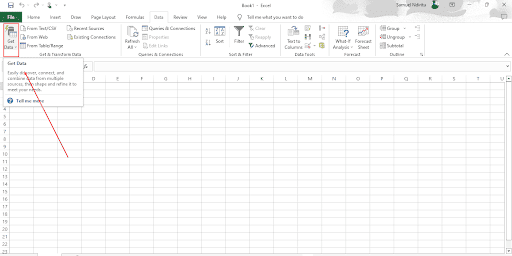
- Now click ‘From Other Sources’ and select ‘From ODBC.’
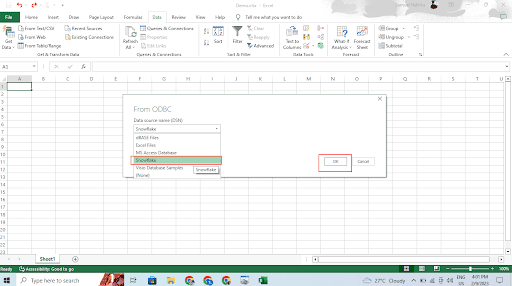
- In the ‘From ODBC’ dialog box, select the Snowflake data source name you created through the ODBC interface and click ‘OK.’
- Enter your Snowflake account information (username and password) in the ODBC Connection dialog box. Click ‘Connect.’.
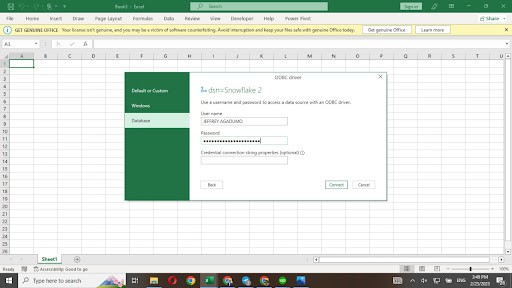
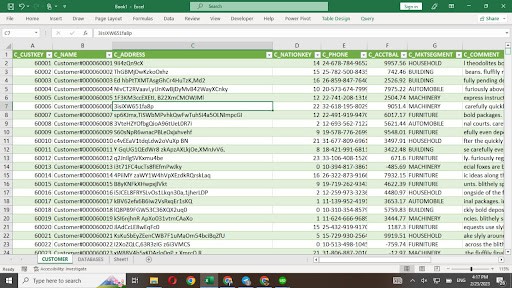
- Your Snowflake data is now available in Excel and can be used for further analysis and reporting.
5. Query Snowflake Data in Excel
- Once you have established a connection, the ODBC driver gives Excel access to all databases in your Snowflake warehouse. Select the database and schema you want to see the data preview and click ‘Load’ to load the data into a worksheet.
You can also Transform the Data in Excel by clicking the ‘Transform Data’ button.
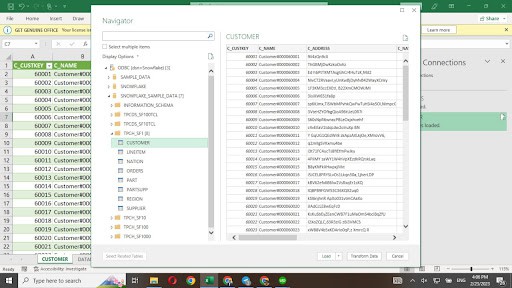
- You can now begin to work on your Snowflake Data in Excel.
Some Common Issues when Connecting Excel to Snowflake
1. Incorrect authentication information: If the authentication information (e.g., username, password) entered into Excel is wrong, The ODBC will not be able to establish a connection.
Solution: Double-check these details to ensure you entered them correctly.
2. Incompatible drivers: If you’re using an old or incompatible version of the Snowflake ODBC driver, it may not work with your Excel.
Solution: Make sure to download the appropriate driver for your version of Excel (get a 32-bit ODBC version for a 32-bit Excel version).
3. Incorrectly configured DSN: If the DSN is not configured correctly, Excel cannot connect to Snowflake.
Solution: Double-check the DSN settings to ensure they are correct, and test the connection in the ODBC interface.
4. Data size limitations: If you import a large amount of data from Snowflake into Excel, you may encounter performance issues or hit size limitations.
Solution: Consider breaking the data into smaller chunks or using other tools to analyze the data.
5. Compatibility issues: If you’re using an older version of Excel, compatibility issues may prevent the connection from working correctly.
Solution: Make sure to use compatible versions of both Excel and Snowflake. If you use a version of Excel below 2019, you can check out this document for more options.