Make the Date Dimension Common to Fact in Snowflake
- How-Tos FAQs
- October 7, 2021

A date dimension is a data warehouse table containing a range of dates with associated information such as year, month, day, week, and so on. A typical use case for a date dimension is answering questions about how a business performs over time. For example, you might want to know how sales have changed year over year or month over month.
The date dimension is usually linked to a fact table containing information about specific events. The date dimension can also be linked to other dimensions, such as a product or customer dimension.
When designing a data warehouse in Snowflake, it is essential to make the date dimension common to the fact table and the other dimensions. This ensures that the data warehouse can be used to answer questions about any period and not just the most recent period.
One challenge with date dimensions is that they can be tricky to set up and maintain. This is because a date dimension often needs to be common to multiple fact tables.
Snowflake provides a couple of options for setting up date dimensions. The first option is to use a separate table for each fact table. This is the most straightforward approach, but it can be tedious to set up and maintain. Creating a shared date dimension has several advantages. First, it reduces the amount of data that needs to be stored in the data warehouse. Second, it makes it easier to query the data warehouse. And third, it makes it easier to add new dimensions to the data warehouse.
The most common way to make the date dimension common to the fact table and the other dimensions is to create a shared date dimension. It’s always great to start with a date dimension table, then create the fact table, and the other dimensions are last created and linked to the date dimension table.
Create a Date dimension common to fact and another dimension
First, create a new table in Snowflake called “Dates” with the following columns:
– date_id (integer)
– date (date)
Then, populate the table with all the dates you want in your dimension.
Next, create a view called “date_dimension” that joins the “Dates” table to your fact table on the “date_id” column.
Finally, create a view called “date_dimension_2” that joins the “date_dimension” view to your other dimension table on the “date_id” column.
If it’s broken, don’t touch it – Meer 🥱
You’ve probably heard this quote in a number of places.
Well… never here. Never at Datameer.
Here we aim to challenge the construct and push the boundaries of modern analytics.
That’s why we developed a multi-persona transformation tool that aids data teams in modeling their Snowflake datasets.
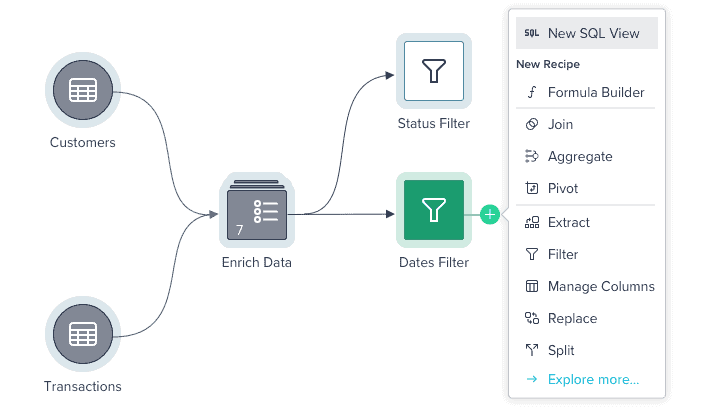
Here’s a codeless showpiece of how easy it is to create new views and edit tables in Datameer
With pre-built modeling & transformation features, you can easily perform joins on your date dimensions using a GUI, view the output, and republish datasets back into Snowflake in a matter of seconds. The best part is you don’t even need to write any code.
Refer to the video to see how easy it is to do this in Datameer with Snowflake datasets.
Sounds like a fairytale?
Explore our Datameer demo on Joins, or try it out yourself with a free 14-day trial .