Connecting Snowflake to Tableau Online
- How-Tos FAQs
- April 12, 2021
Connecting Snowflake to Tableau Online is a fairly easy task. There might be an initial one-time set up to ensure Tableau Online can communicate with Snowflake. Once the initial configuration is complete, there are two ways to get Tableau Online connected to Snowflake data.
Snowflake configuration
To connect Snowflake to Tableau Online, some configuration might be necessary in Snowflake. If Snowflake has a security policy, meaning only certain IP addresses can access Snowflake, Tableau Online’s IP addresses need to be added to Snowflake’s security policy.
At the time of this writing, Tableau’s list of IP addresses can be found here:
The url of a Tableau Online instance has the physical location or data center identified in the url. This url maps to the IP addresses that need added to Snowflake’s security policy whitelist/allowlist.
Connecting Snowflake to Tableau Online
Connecting Snowflake to Tableau Online with Tableau Desktop
Tableau Desktop can be used to create a data source that connects to Snowflake. A Snowflake Tableau Desktop data source can be published to Tableau Online, which can be used in Tableau Online as a data source to create new Tableau workbooks.
Before connecting to Snowflake with Tableau Desktop, Snowflake’s ODBC Driver must be installed on the same computer as Tableau Desktop. To download and install Snowflake’s ODBC driver, login to Snowflake, navigate to Help > Download > ODBC Driver. Download and install the appropriate driver for your operating system.
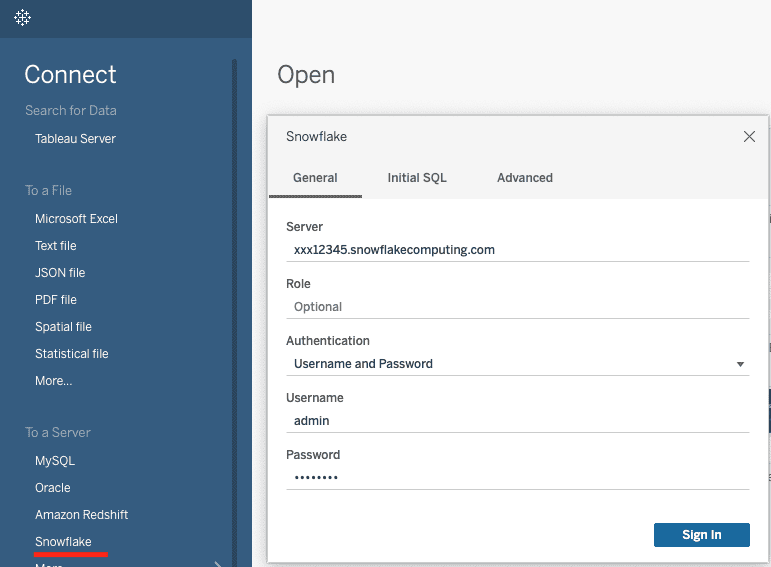
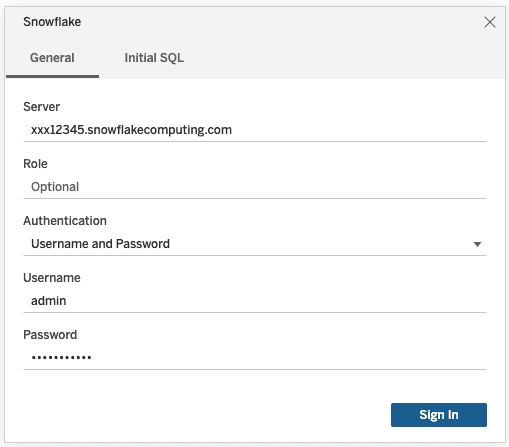
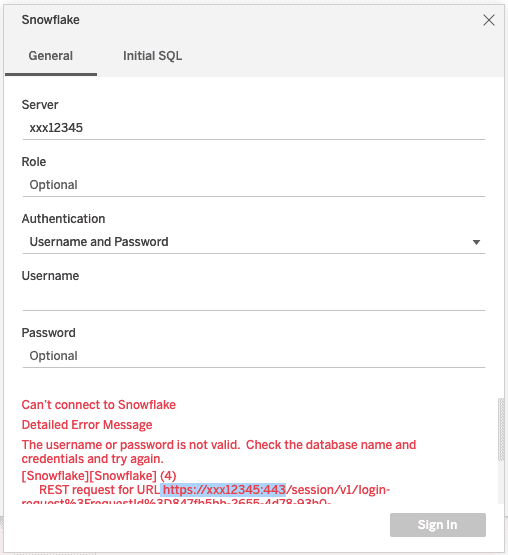
Once Snowflake’s ODBC driver is installed, open Tableau Desktop. From the connect pane, select To a Server > Snowflake. A Snowflake connection dialog box will open. Enter the full url of the Snowflake server. Use one of the 3 Authentication methods to connect to Snowflake.
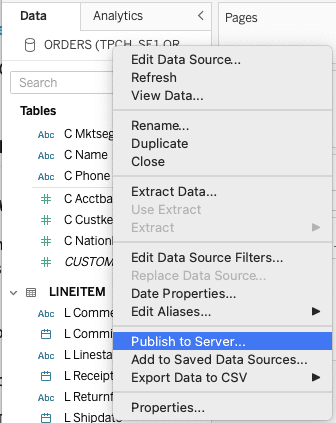
Create a data source using Snowflake as a source. To publish to Tableau Online, right click the data source and select Publish to Server. Login to Tableau Online, if needed.

A dialog box will open. An important setting for published data sources is the Authentication method. “Prompt User” will require users of this data source, or any workbooks connected to it, to login to Snowflake with their own credentials. “Embedded password” will embed the password of the data source creator, so that end users don’t need to have Snowflake credentials to use the data source or any workbooks connected to it. Once the data source publish options are selected, publish the data source to Tableau Online.
Connecting Snowflake to Tableau Online with Tableau Online Web Authoring
With a Creator license, new data sources can be created directly in Tableau Online with Web Authoring. This method does not require Tableau Desktop or any additional drivers.
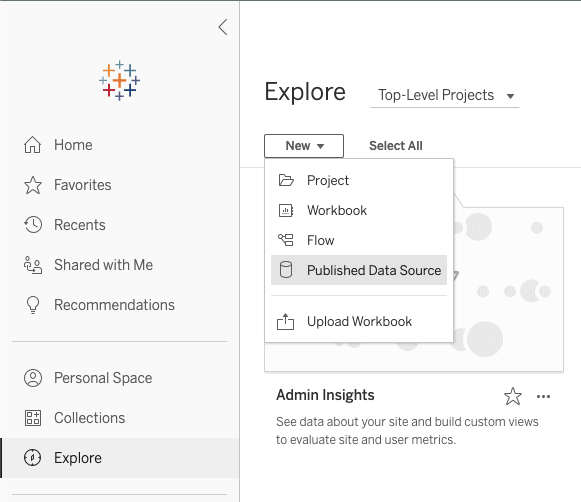
Login to Tableau Online and navigate to the Explore page. Select New > Published Data Source.
Select Connectors > Snowflake.
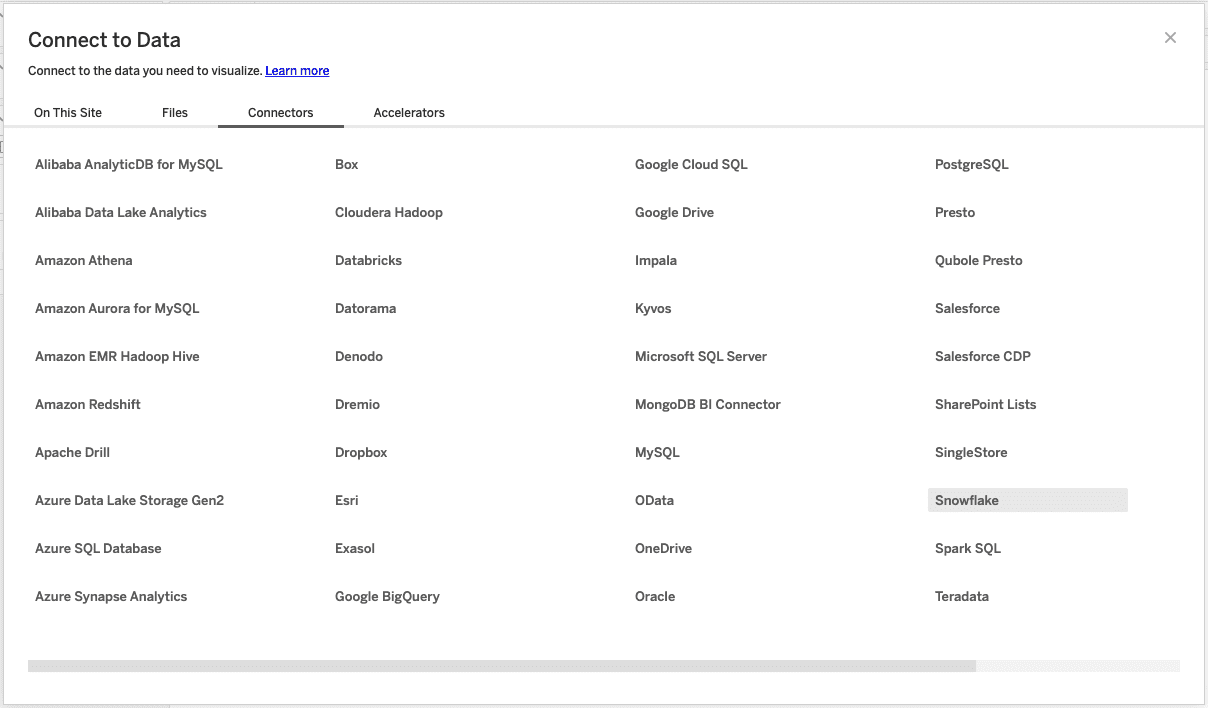
The same connection dialog box as Tableau Desktop will pop up. Fill in the details of your Snowflake connection. Once again, be sure to include the full url of the Snowflake instance.
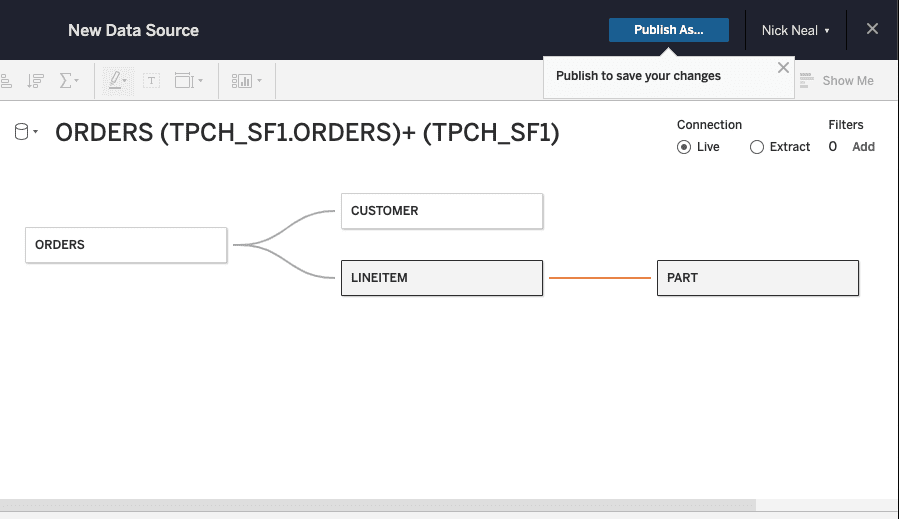
Create a data source. When ready to publish, select Publish As… at the top right of the data source editor.
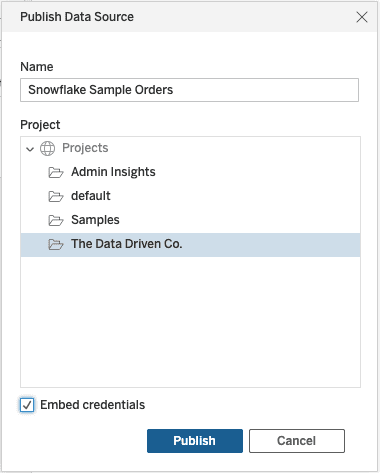
Give the data source a name, select a project and then don’t miss the little checkbox at the bottom. This is the same option as the Authentication option in Tableau Desktop. Leave it unchecked to prompt users to enter Snowflake credentials. Check it to embed the username and password of the data source creator. Click Publish to make the data source live in Tableau Online.
Troubleshooting
Most problems following this process relate to the connection between Snowflake and Tableau Online. Snowflake needs to allow the correct Tableau Online IP addresses in the Snowflake instance’s security policy. The other common error is using the server name without the full url of the Snowflake instance. This will result in an error that appears to be an incorrect username or password, but a closer look at the details of the error will show that the url being accessed is incorrect.
Connecting with Datameer
With Datameer, after a one-time configuration to work with your Snowflake instance, there are no additional steps to create a new connection. Simply log in to Datameer, and all your schemas and tables are available to add to a new recipe. Start your free trial today