A practical guide to importing data from Snowflake to Power BI
- How-Tos FAQs
- November 10, 2022
In this article, we will guide you through a step-by-step guide on how to connect Power BI to Snowflake.
The Snowflake Data Cloud is an advanced, industry-leading data platform available as Software-as-a-Service (SaaS) to numerous enterprises worldwide.
With Snowflake as a leading choice for cloud-based data storage, integration with Microsoft Power BI was the next logical for a lot of firms.
According to Gartner ratings in 2021 , Power BI tops the board of leading BI vendors in the industry with a large gap.
With over 130+ data integrations and its free business model approach, it’s safe to say that they have a large customer base.
Pre-requisites:
- A basic understanding of Power BI Desktop.
- A Snowflake account.
- A Power BI account.
Before proceeding further, first, let’s understand the difference between “import” and “directQuery” connection types in Power BI.
An understanding of these connection types will help you select the best use case for your work.
Let’s dive in!
But First – How To Reduce Time Spent On Power BI Transformations (Using Datameer).
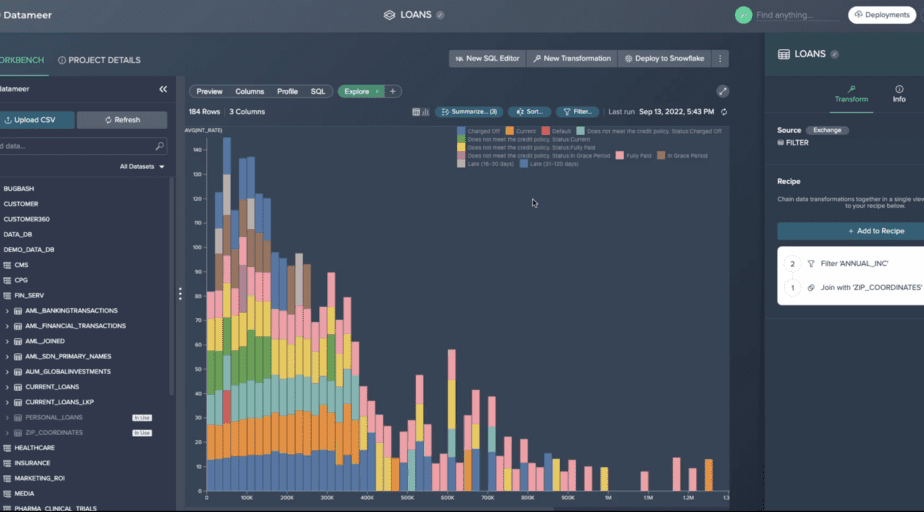
In this section, we will introduce Datameer, a modern analytics platform for Snowflake.
Datameer is the world’s first collaborative, multi-persona data transformation platform integrated with Snowflake.
It brings together your entire team — data engineers, analytics engineers, analysts, and data scientists – on a single platform to collaboratively transform and model data directly in Snowflake, keeping data secure and using Snowflake’s scalable compute and storage.
If you’re thinking of consuming your Snowflake data in Power BI, here are a few things Datameer can help you with:
- Modeling your Snowflake Data prior to consumption in Power BI.
- Serves as SQL data visualization tool for Your Snowflake Data: With Datameer, you can use drag-and-drop features to simulate SQL modeling.
- Catalog-like Snowflake Data Documentation: Datameer automatically documents system-level metadata and properties, allowing teams to discover and share knowledge about their Snowflake data models easily.
- Tight-Knit Integration With Snowflake: Datameer offers a way to build models directly into Snowflake without worrying about data reconciliation or loss. Due to Datameer’s tight integration with Snowflake, all transformations and modeling leverage the Snowflake engine and scalability, resulting in high data security and easy governance.
- Ad-hoc analysis, easy scheduling, and sharing of Snowflake reports: Datameer provides top-notch collaboration features that help to increase productivity and avoid coding rework within data teams.
These are just a few perks of Snowflaking with Datameer.
Want to learn more tips for maximizing your Snowflake modeling experience?
Check out our step-by-step guide on moving data from google analytics → Snowflake →Power BI.
Types of Connection in Power BI:
Import:
With the Import Mode, your data is kept within the Power BI Model and is compressed to save space.
Connecting to your Snowflake instance in the Import Mode for Power BI is recognized to have substantially better performance owing to the in-memory and high compression capabilities of the Power BI engine.
The Import Mode has a few restrictions. Some of these include data size constraints of 1GB and dependency on manual refresh, etc.
DirectQuery:
The DirectQuery works as a virtual query sitting on top of the data source.
The major advantages of this mode are real-time reporting and the ability to query large datasets.
DirectQuery reporting has various restrictions as well.
Some of these restrictions are limited DAX formulae, limited Power Query operations, and a display limit of approximately, 1M rows.
Importing Snowflake data into Power BI: Step-by-Step Guide
Step 1: Get Data
To connect to a Snowflake Account, select “Get Data” from the Home ribbon in Power BI Desktop.
Click on database and select ‘Snowflake’.
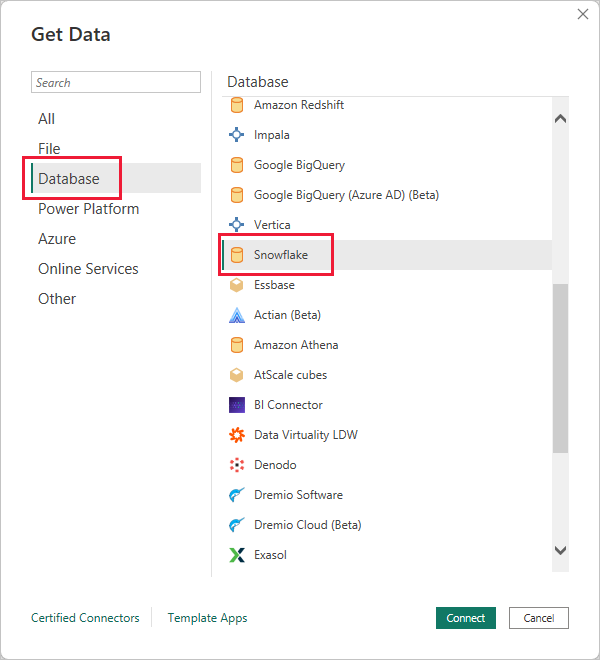
Source: Microsoft
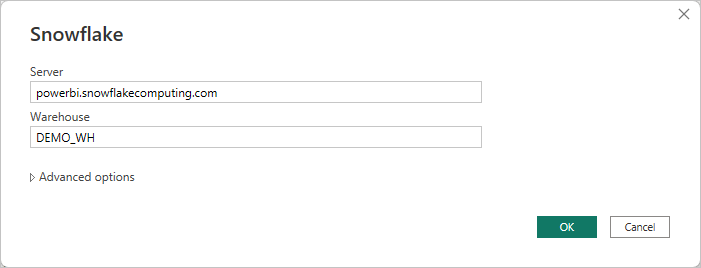
Step 2: Enter Server and Warehouse ID and Select Connection type
In this step, you will be required to input your Server and Warehouse IDs (these credentials can be found on Snowflake).
The URL you connect to your Snowflake instance will contain your server name.
You have the choice of using Import or DirectQuery as a connection type. Continue by selecting your mode of connection and clicking OK.
*Note : Only AAD SSO supports DirectQuery.*
Source: Microsoft
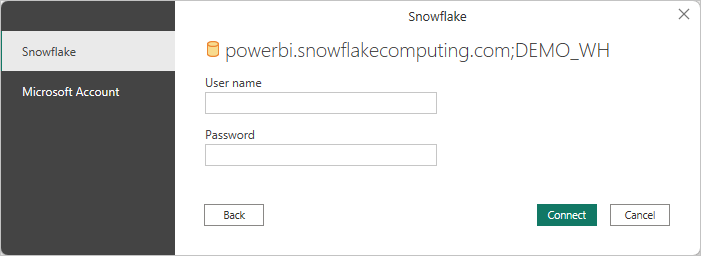
Step 3: Sign In
At this stage, you can either enter your Snowflake username and password to connect to your Snowflake account or authenticate through Microsoft Azure Active Directory (AAD) and click “Connect.”
Source: Microsoft
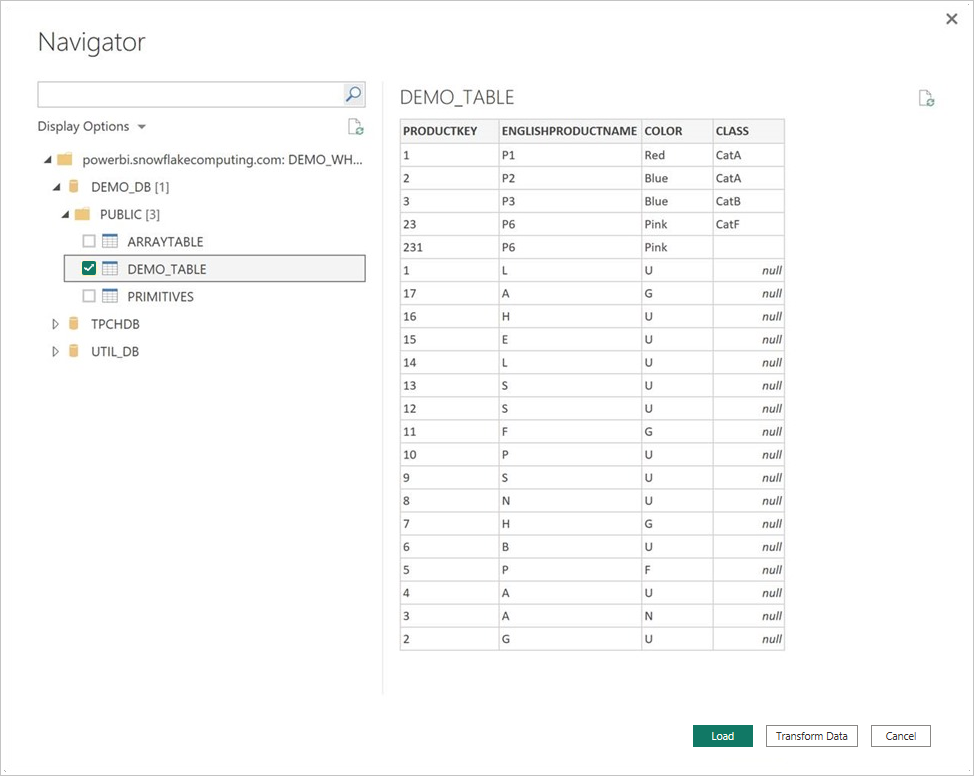
Step 4: Select Tables/Views
When you connect successfully, a Navigator window appears, displaying the data accessible on the server, from which you may choose one or more items to import and, utilize in Power BI Desktop.
You can either load the select table , which loads the full table into Power BI Desktop, or Transform Data into the query, which opens Power Query Editor and allows you to filter and modify the set of Data before load.
Source: Microsoft
That’s all! Congratulations! You have successfully imported the data from Snowflake into the Power BI platform.