How to Get Google Analytics Into Snowflake
- Datameer, Inc.
- August 17, 2022
Hi marketer 👋, are you new to Snowflake and want to learn how to get Google Analytics into Snowflake and how to use your GA4 web data within Snowflake?
You’re in luck!
In this tutorial, we will guide you on how to:
- Replicate your Google Analytics data into the Stitch Integration tool.
- Automatically extract and load your GA4 data from your Stitch account to Snowflake.
- Transform and model your raw GA4 datasets within Snowflake in an easy-peasy manner!
- And finally, visualize your data in Power BI.
Ps: All tools or services used in this tutorial are free, so please feel free to follow along !😉
PREREQUISITES
The steps covered in this tutorial will be clear and beginner-friendly. However, if you’d like to follow along, here are some mandatory requisites you should note.
Must-haves:
- A Basic understanding of GA4 or Universal Analytics
- A functional Google Analytics account linked to an active website (website should have a considerable amount of data)
- A Stitch data account.
- A Snowflake account.
- Access to Power BI
OVERVIEW & USE-CASE
Before diving in, let’s look at a diagrammatic representation of the process we’ll be covering today.
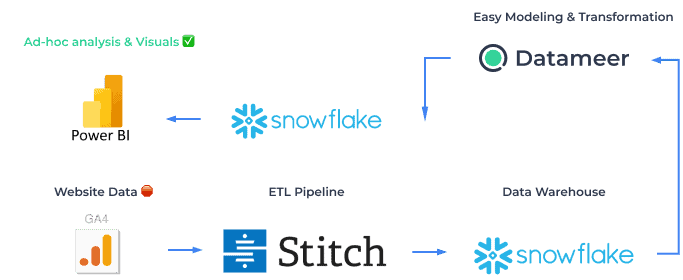
So let’s say, for example, you have some data on website activity and user behavior in your google analytics account.
You would then like to consume this data within your Snowflake warehouse.
How can you achieve this?
Let’s answer that with our step-by-step guide.
Moving Your GA4 Data into Snowflake: THE STEP-BY-STEP GUIDE
Step 1️⃣ – Replicate your Google Analytics data into Stitch.
Stitch is an easy-to-use ETL pipeline tool. It will serve as our ETL tool, Extract (from GA4), and Load (Into Snowflake).

To begin, we first have to:
1. Create A Stitch account : If you don’t have a Stitch data account, you can sign up for a free one here .
2. Sign In to your Stitch account and add Google Analytics as a Stitch data source.
The steps to do this are as follows:
- On the Stitch Dashboard page, click the Add Integration button.
- Click the Google Analytics icon.
- Enter a name for the integration. This is the name that will display on the Stitch Dashboard for the integration; it’ll also be used to create the schema in your destination.
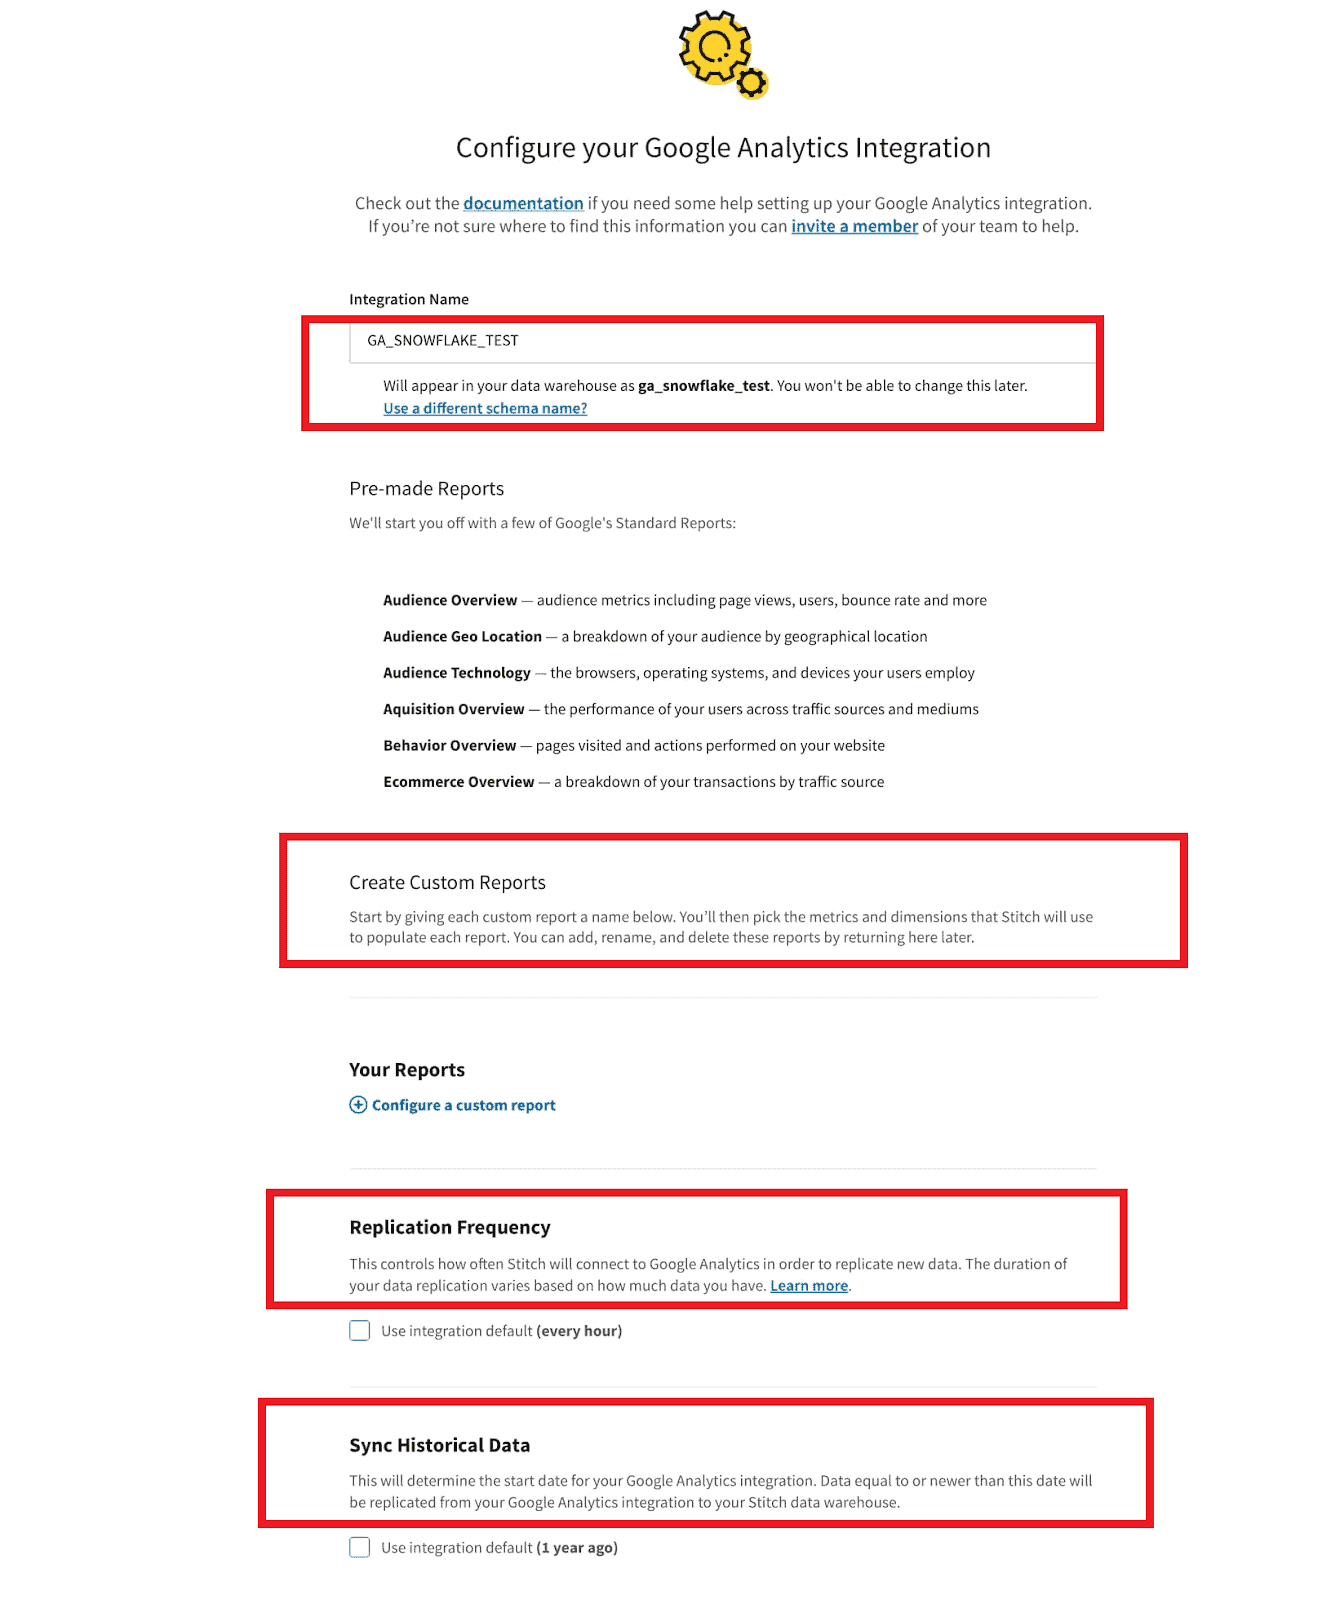
- The screen below will appear.
3. Configure Your google analytics Integration.
- Configure your custom reports (Optional): You can configure the custom report(s) you want to replicate. The report(s) you enter on this page is used to create the tables in your destination.
Ps: If you don’t want to configure a customer report, you can leverage pre-made standard GA reports. (as shown in the image above).
- Define the historical replication start date and set replication frequency.
The Sync Historical Data setting defines the starting date for your Google Analytics integration, i.e., data equal to or newer than the date specified will be replicated to your data warehouse.
- Set replication frequency: The replication frequency refers to how often Stitch runs a replication job and the time that job begins.
4. Check your settings, and click “Authorize.”

5. Authorize Stitch and select a Google Analytics profile.
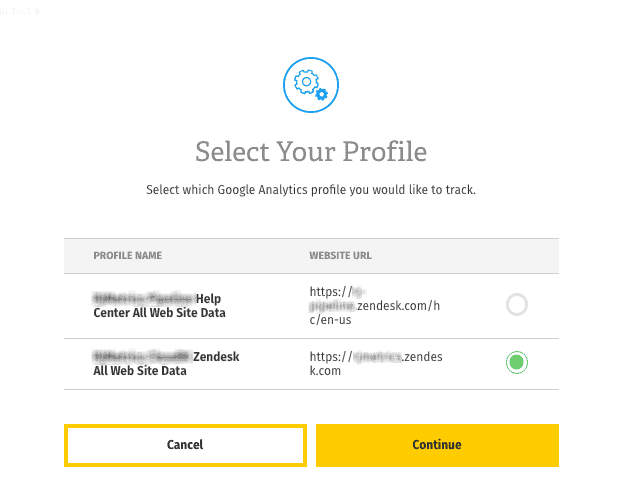
Ps : GA profiles need to have Read & Analyze permissions to be detected by Stitch
7. Set metrics and dimensions to replicate
If your configuration setup is successful, you will be able to see the tables in your GA account in Stitch. (See image )
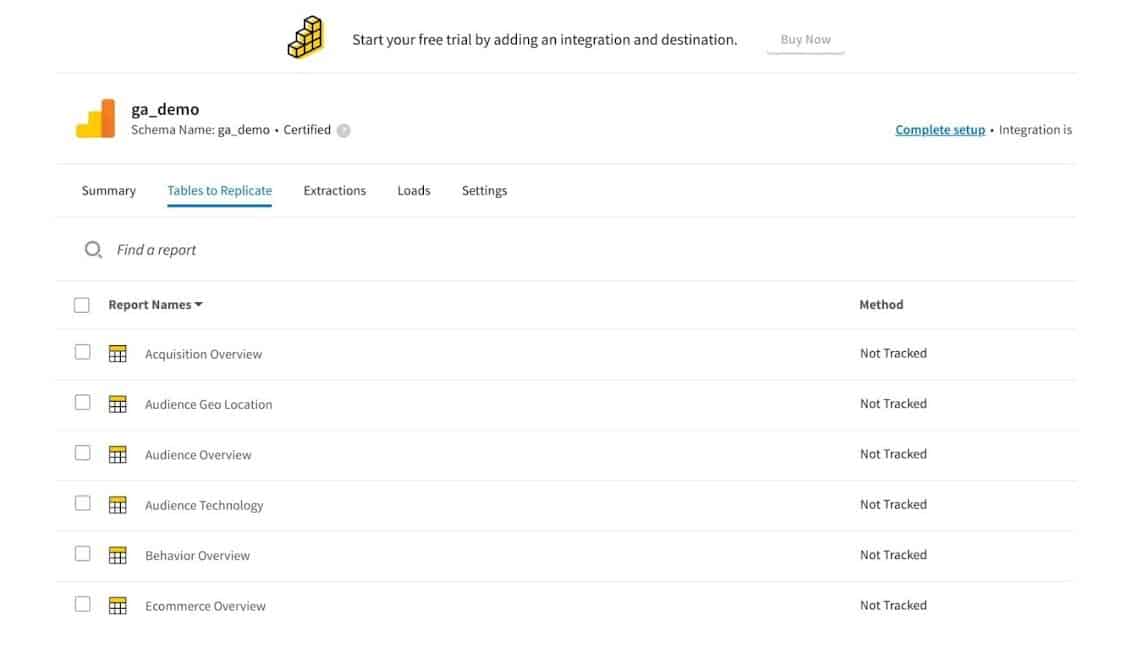
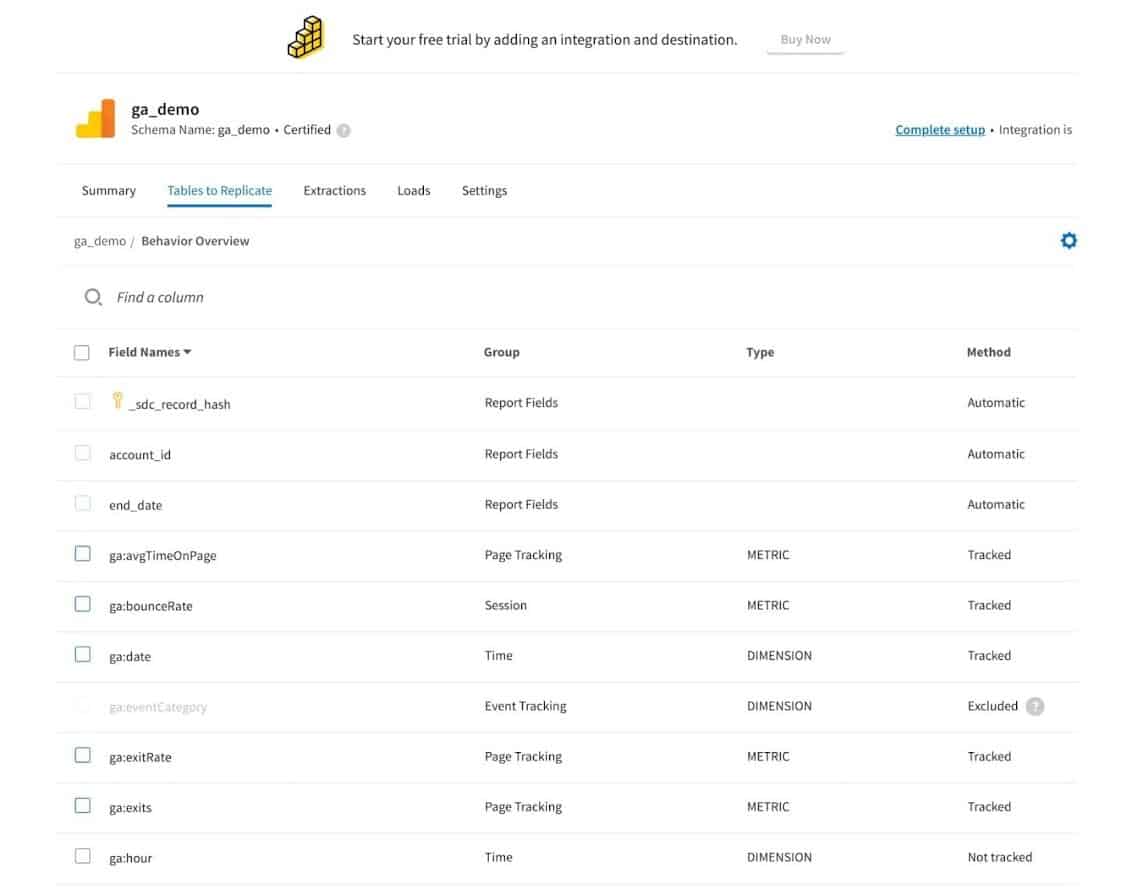
- To complete the setup, you’ll need to select metrics and dimensions for each report you want to replicate to your destination.
In our case, we picked the behavior overview table. Now we have to select the metrics and dimensions we want to be included in our dataset. (see image below)
8. Save your selections : When finished, click the “Finalize Your Selections” button at the bottom of the screen to save your selections.
With that, you just achieved a successful integration of your GA account to stitch.
First step – Extraction Complete ! ✅
Step 2️⃣: Automatically load your GA4 data from Stitch to Snowflake .
⭐ HIGH-LEVEL STEPS
After successfully establishing a connection between GA4 and Stitch, Stitch will prompt you to add a destination. (See image)
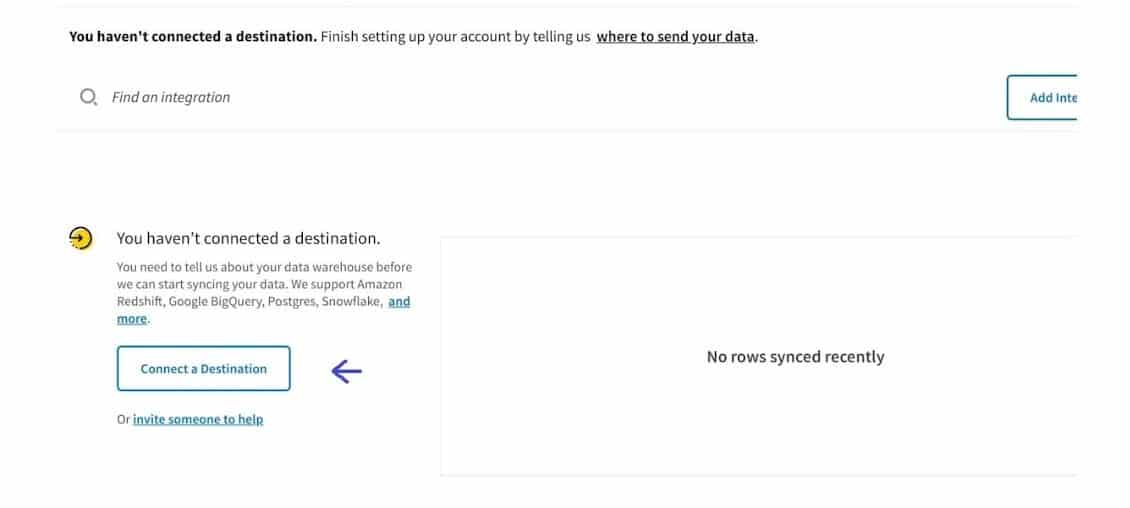
To load your now “replicated” GA datasets into Snowflake, you need to set up a connection between Stitch data (ETL Pipeline) and Snowflake(Data Warehouse) – hence the need for setting a Destination.

The steps to do this are as follows:
- Click Connect to a destination and select Snowflake from the list.
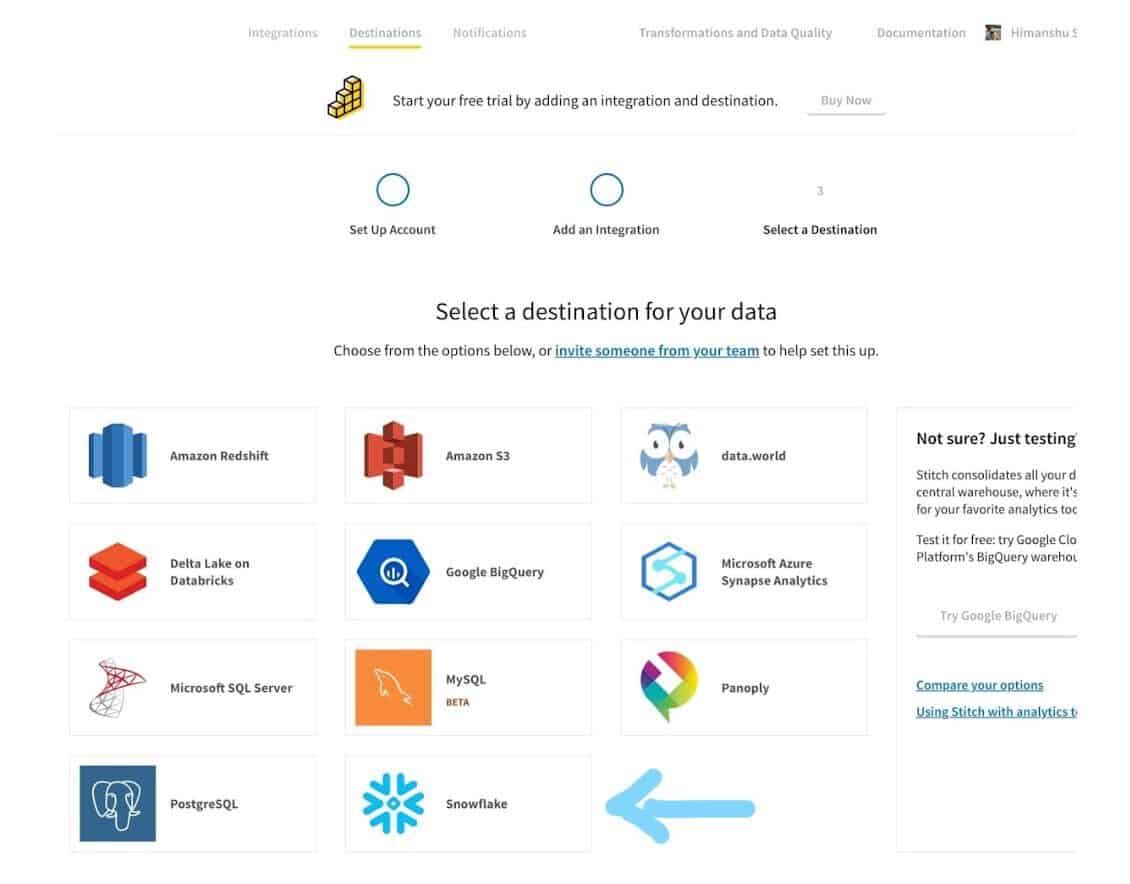
The screen below should appear.
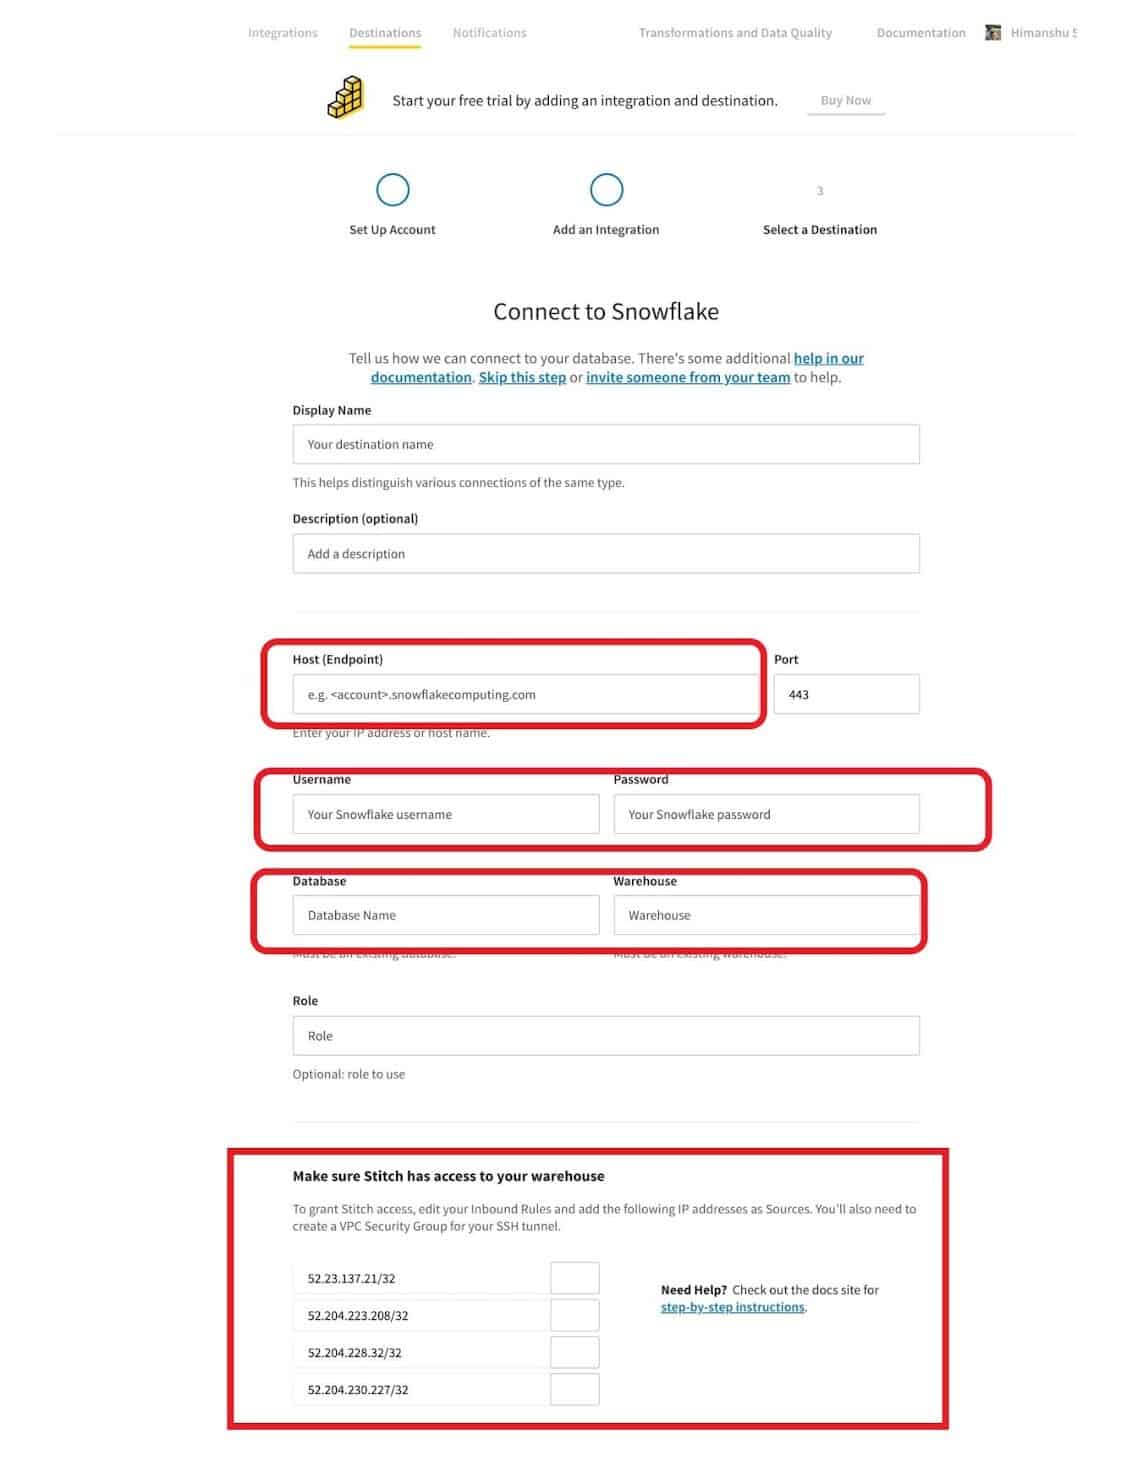
To fill in the parameters above, we need the correct input values.
Input values include: Snowflake Host(endpoint) , Snowflake Username , Database , role,etc. These all refer to Snowflake parameters.
Therefore, before proceeding, we have to set things up on the Snowflake side.
⭐ SETTING THINGS UP ON THE SNOWFLAKE SIDE …
To perform this setup, we need to:
1. Create A Snowflake account : If you don’t have a Snowflake data account, you can sign up for free here .
Ensure you have ACCOUNTADMIN role privileges in Snowflake, OR privileges equivalent to the SECURITYADMIN and SYSADMIN roles.
2. Log In to your Snowflake client and use the GUI or worksheet interface.
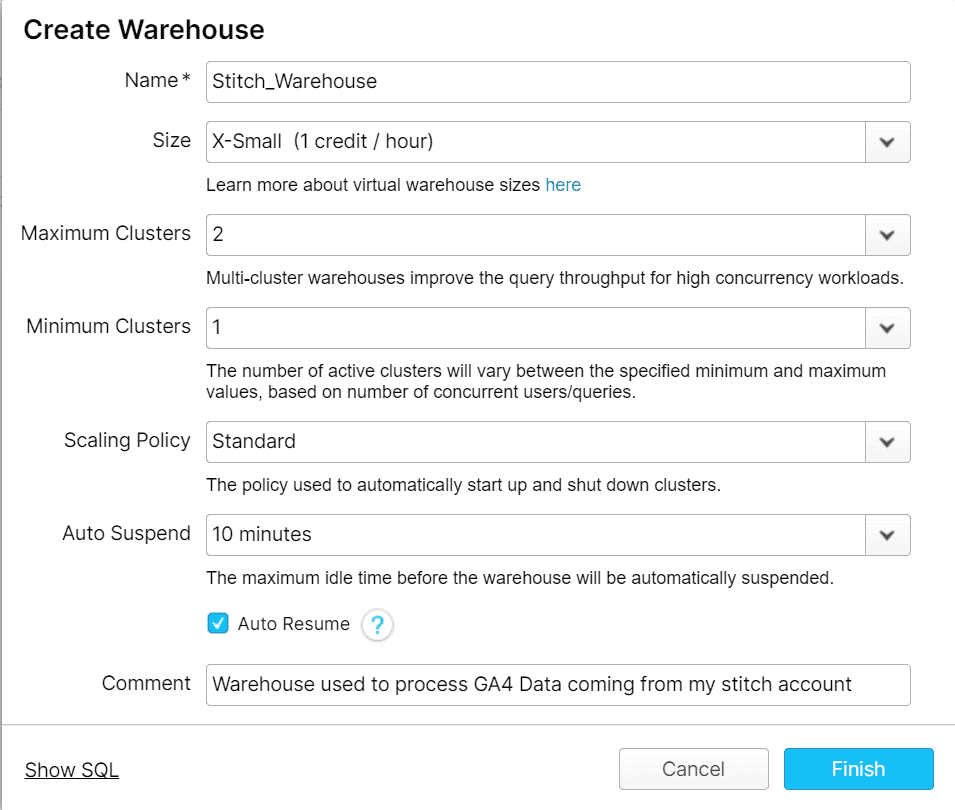
3. Create A Warehouse. ( see image below)
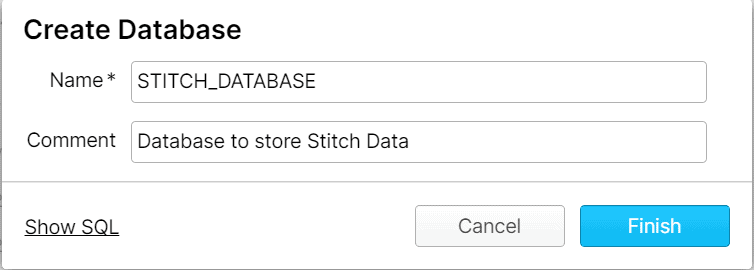
4. Create a database (see image below) and database user (optional) for Stitch in your Snowflake account.
Ps: In a production setting, you might not have access as the SYS admin, so in cases like this, you can ask the security admin to create a custom role for you.
5. Configure Network Access Settings : In Snowflake, access is configured and managed through Network Security Policies.
Stitch’s IP addresses must be added to a network policy’s Allowed IP List for the connection to be successful.
Ps: If this sounds like IT jargon, not to worry. Just follow along closely 😉 you’ll get it right!
The first thing we want to do is:

- Navigate to the account tab in Snowflake and search for policies
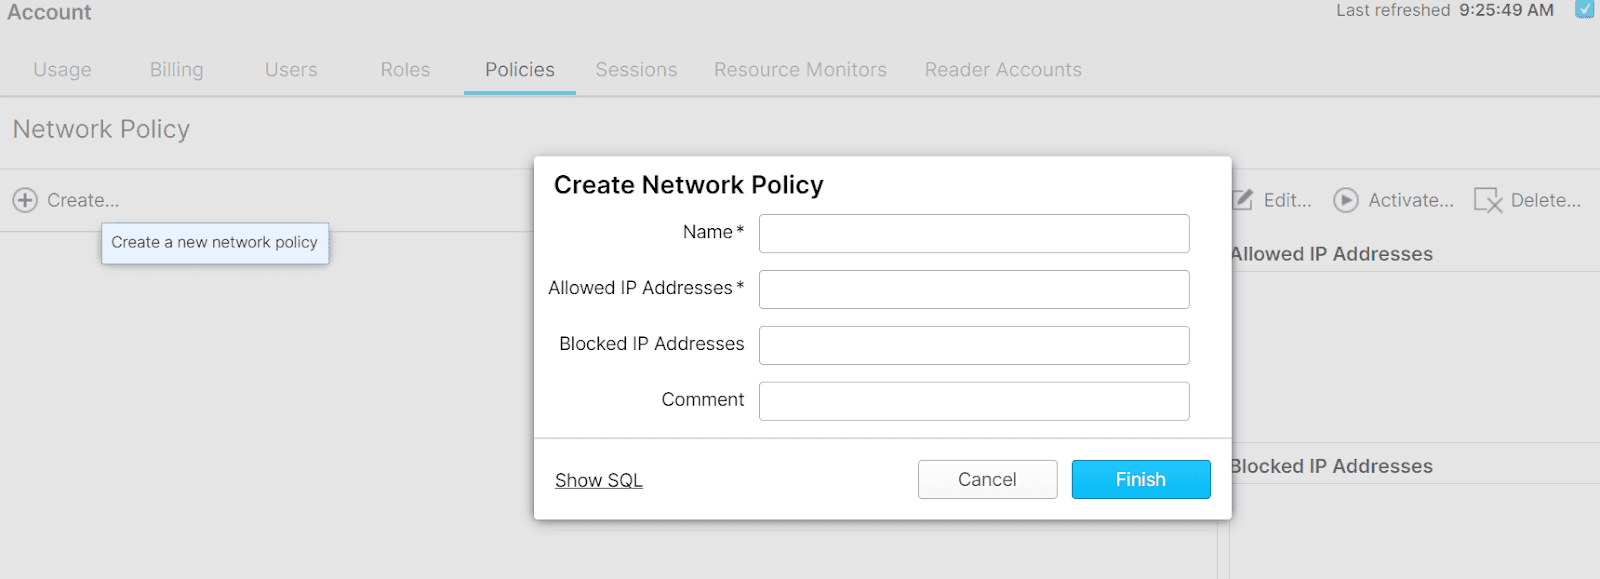
- Create and name our Network Policy.
- Using the format below fill in the allowed IP addresses: (‘<your-current-ip-address>’,'<comma-delimited-stitch-ip-addresses>’);
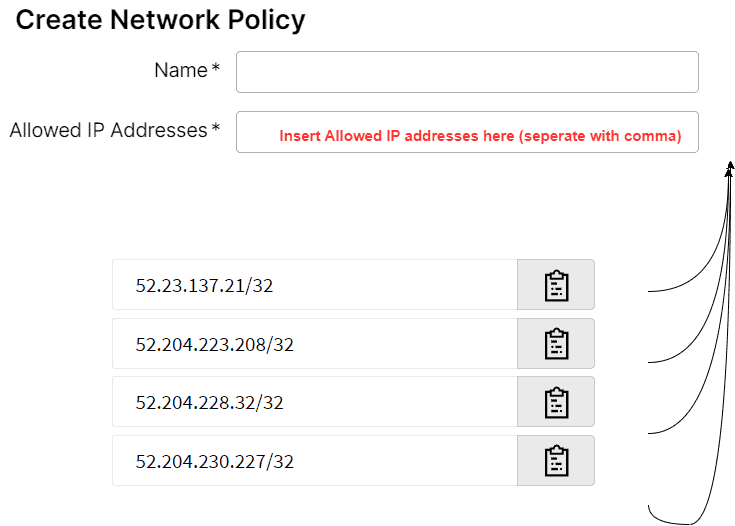
Ps: The allowed IPs can be found on your Stitch Destination Page. Refer to the third image in this section.
Once this is done, We can leave our snowflake environment for now.
Let’s head back.
⭐ BACK TO DESTINATION CONFIG ON STITCH …
We’re done setting up things on Snowflake and now have the input values we need.
It’s time to fill our red boxes with the corresponding input values.
- Input your Snowflake Credentials
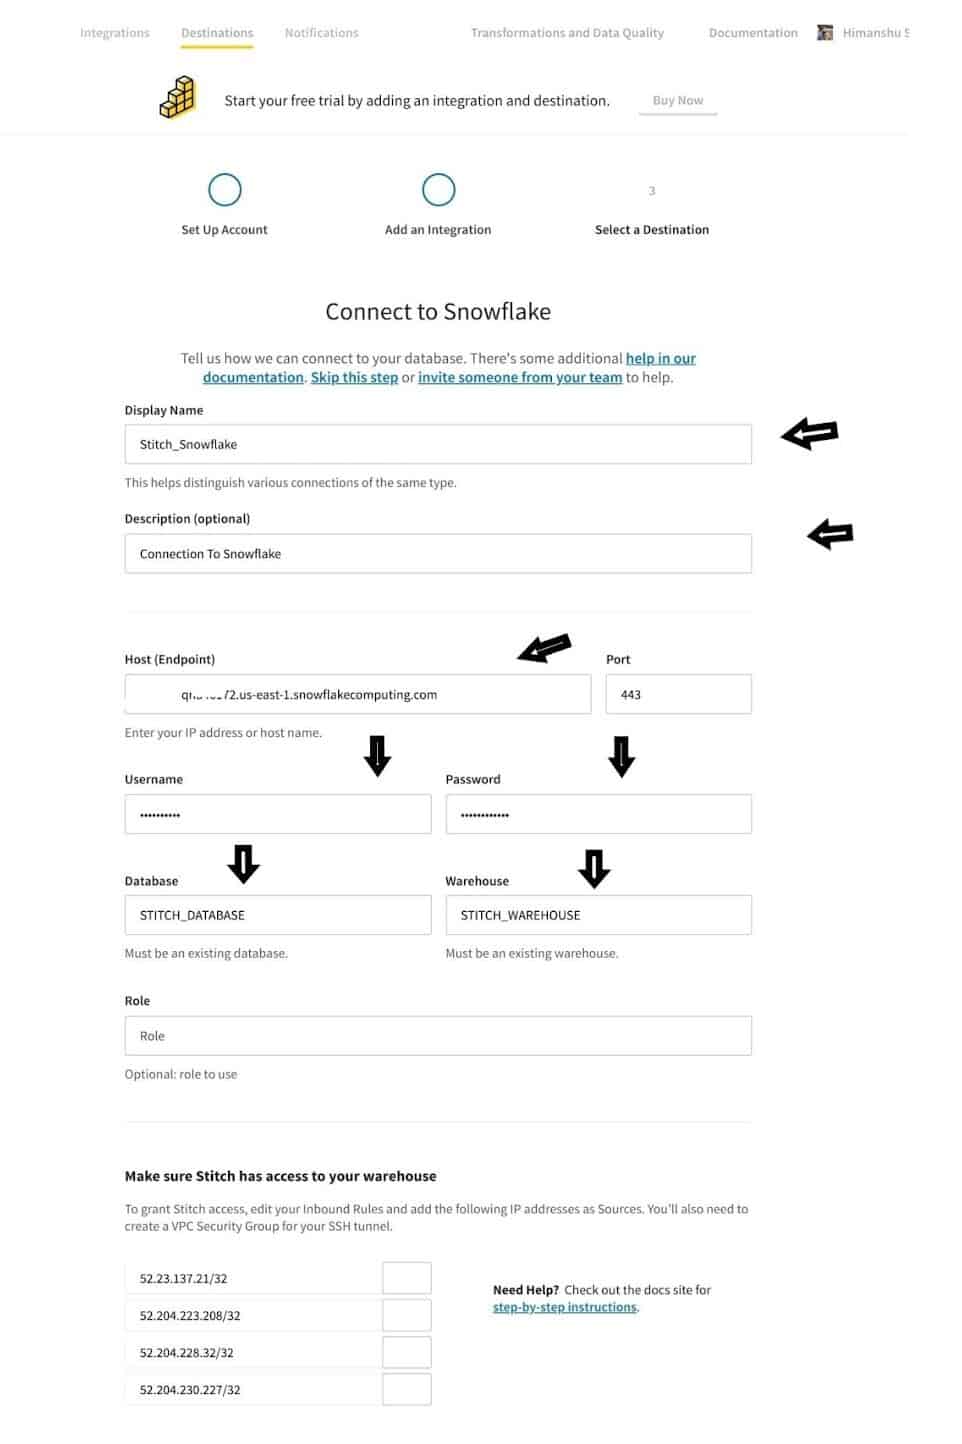
NB: Note: When filling out the host , entering the http:// or https:// portion of the URL will prevent a successful connectio n, i.e., your host URL should look like stitch.Snowflakecomputing.com , for example.
- The next step is to test our connection by saving and clicking Continue.
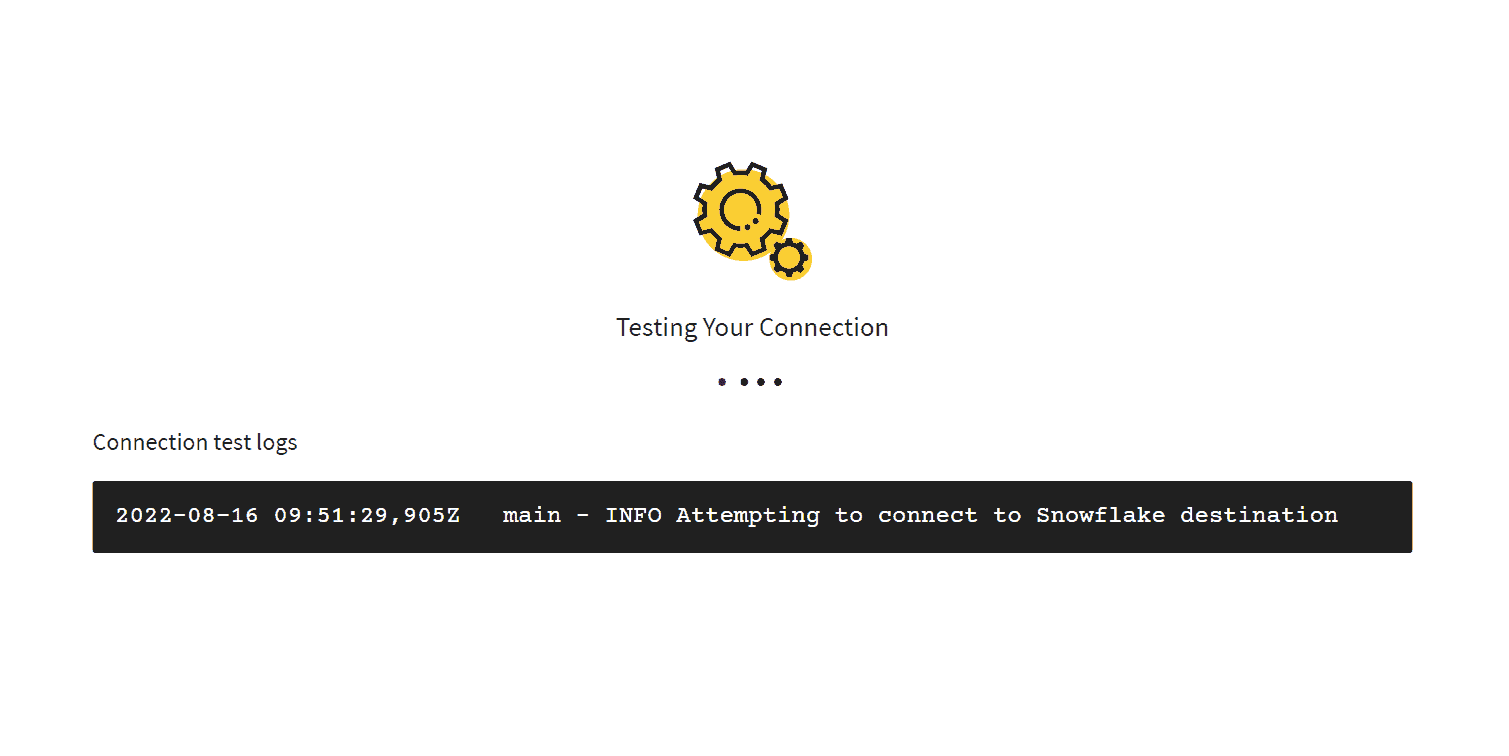
- And Voila!
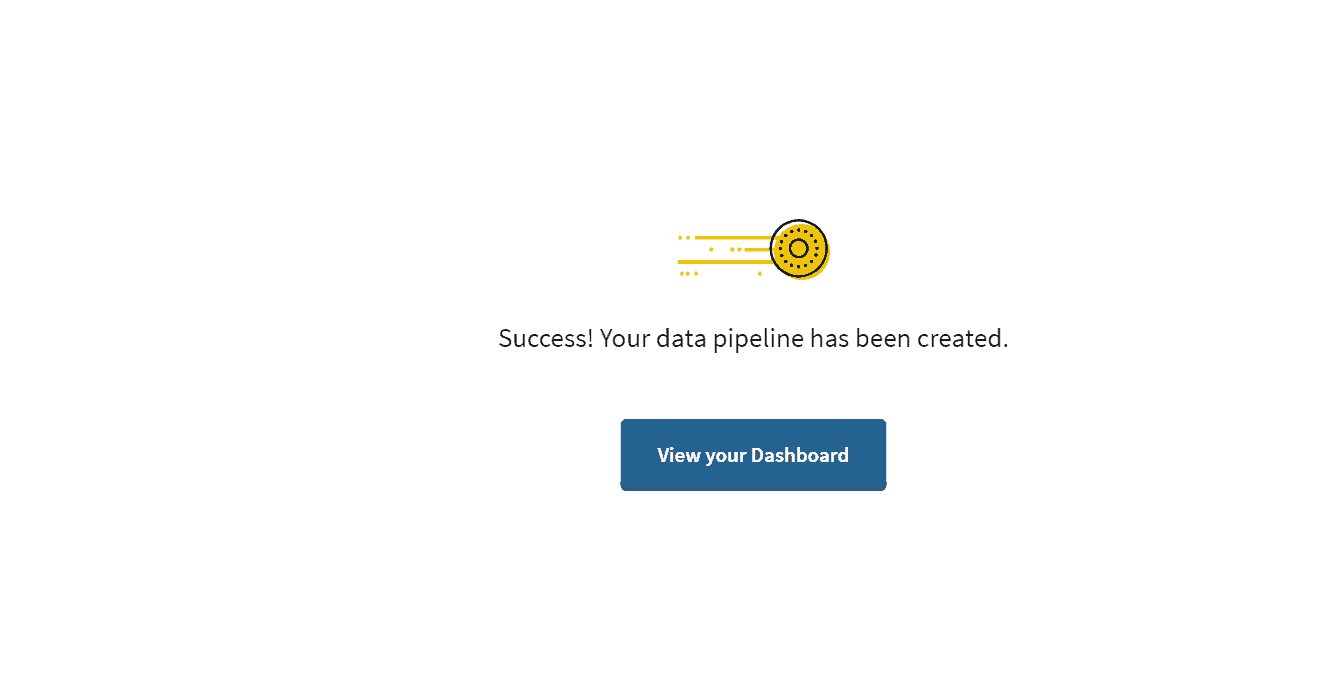
Quick check: Notice that our Stitch_database in Snowflake has received our Google Analytics Data Set .
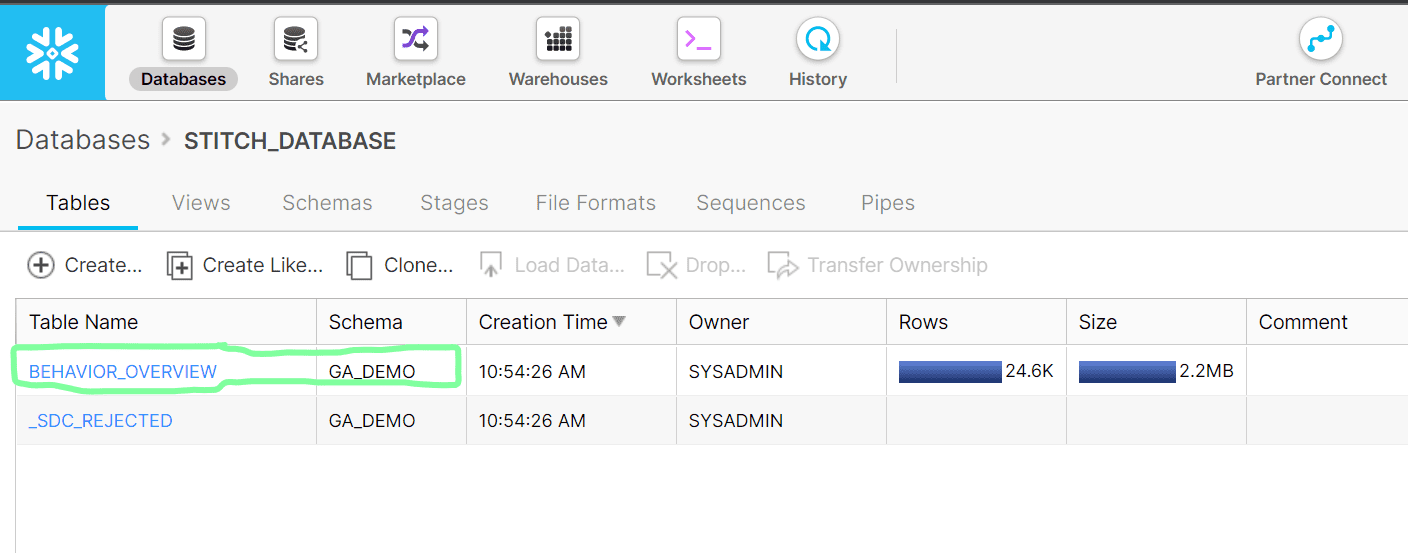
Once again, we prevail. 😅
Second step – Load Complete ! ✅
Step 3️⃣: Transform and model your raw GA4 datasets within Snowflake – in an easy-peasy manner!
You deserve a chill espresso if you’ve tagged along up until this point.
So far, we have configured an integration, and our Google analytics data is now in Snowflake.
Trivia time!
Q: We have our data in Snowflake now. What if we wanted to perform modeling and cleaning on our GA data set?
A: We would have to do this in Snowflake using long lines of SQL.
That sounds like a bit of a bummer, right?
That’s because, in all honesty, marketing analysts like ourselves aren’t always experts in SQL 😑.
But what if we don’t have to be?
What if we could achieve the same results with fewer technical procedures?
It’s Datameer!
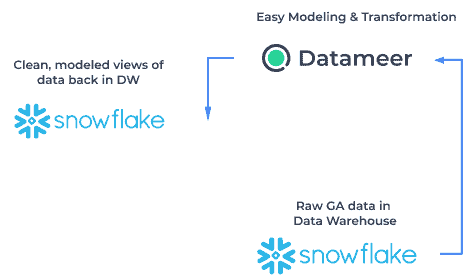
With tools like Datameer, we can use drag and drop features to model, transform and wrangle our data set in minutes, as we will soon see.
Let’s begin the transformation and modeling of the raw GA4 data that sits in our snowflake environment.
⭐ Setting things Up
The first step would be to:
- Sign Up for a Datameer account.
- Check your mail and access the instance sent to our inbox.
- Navigate to settings ⇒Click Snowflake Settings
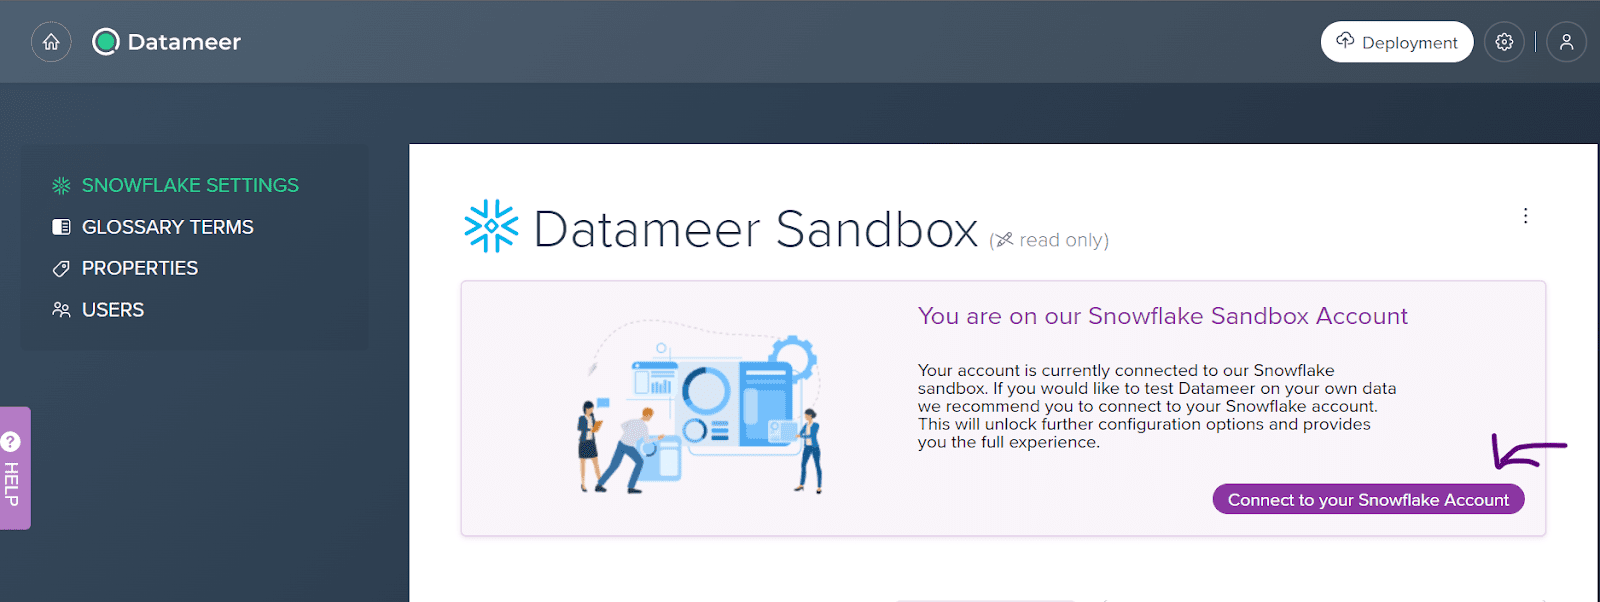
- Connect to your Snowflake account
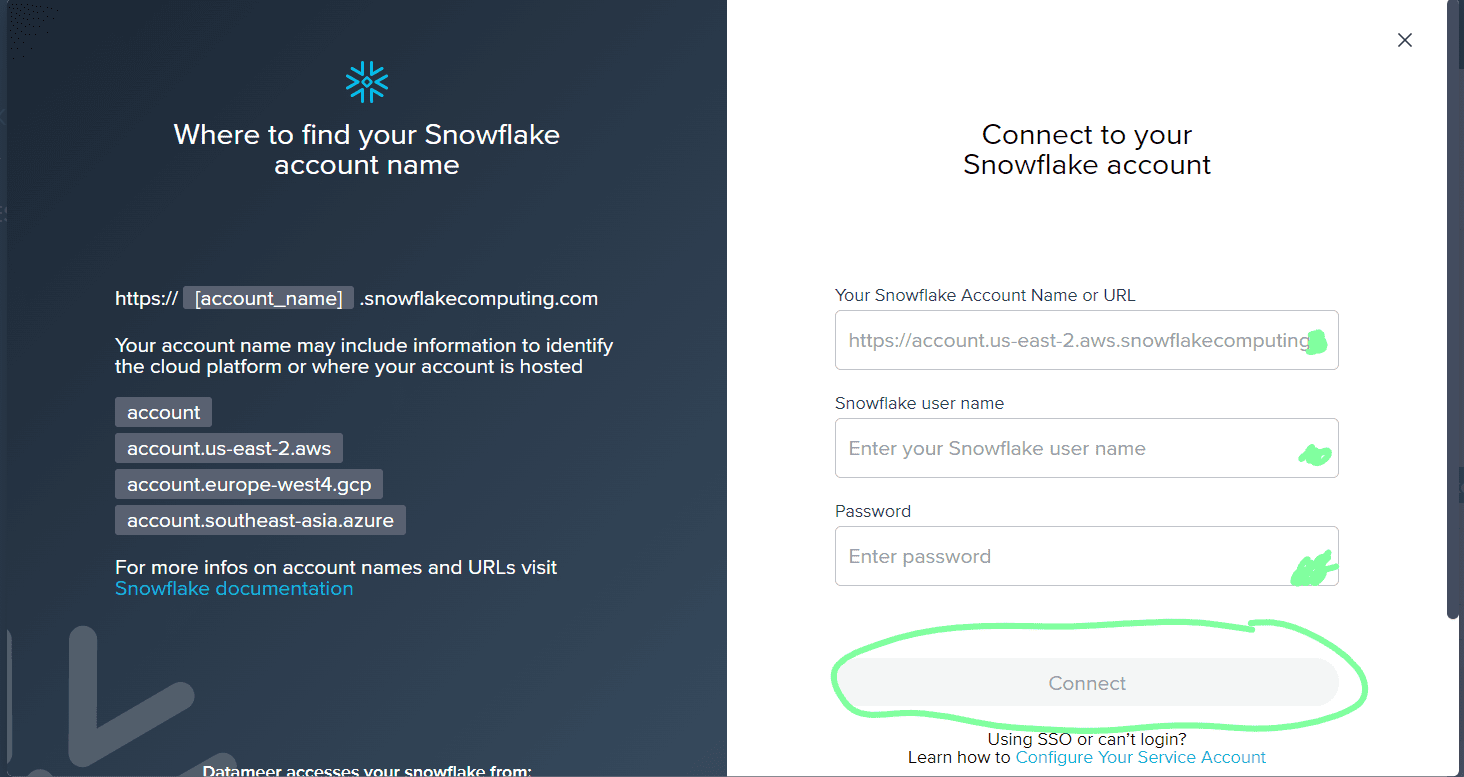
- On success, you will be prompted to specify a warehouse.

A quick tip: If your input values are correct, your account will sync with Snowflake in a few seconds.
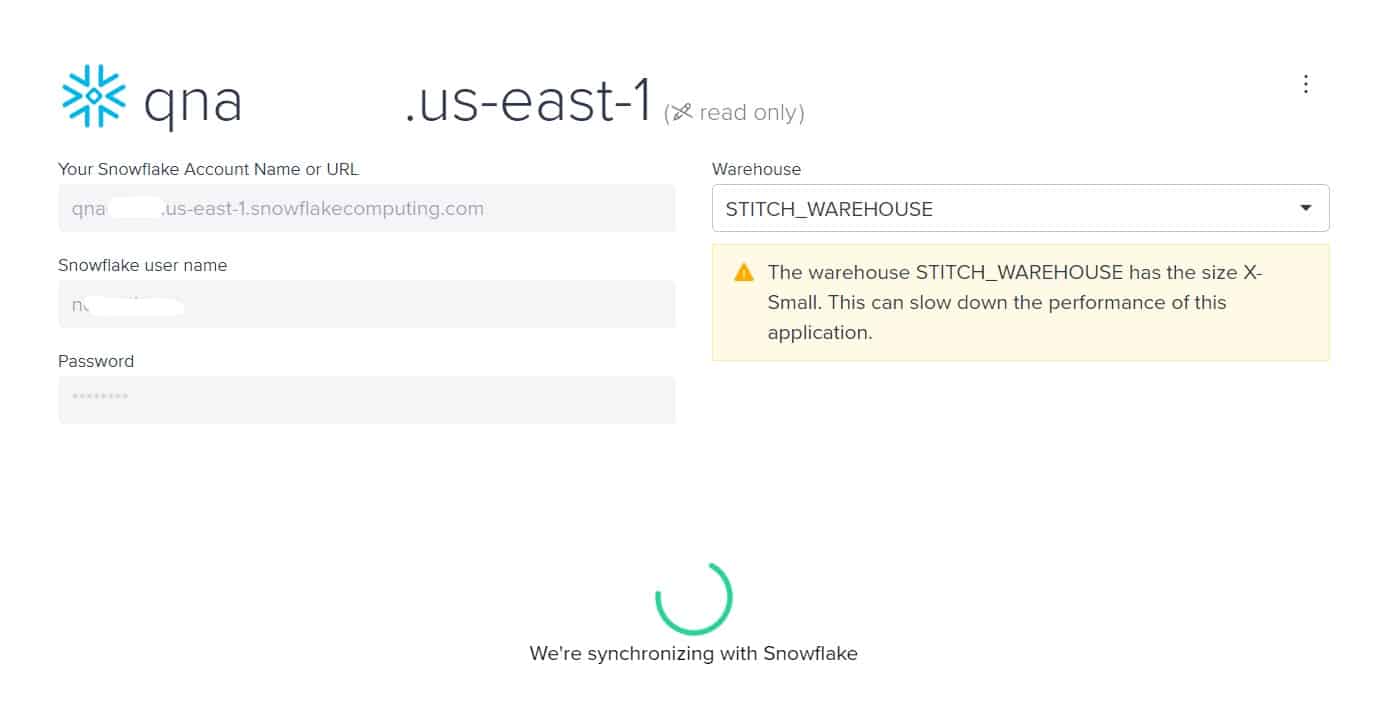
Super easy, right? 🙃
Before we proceed, let’s navigate to the home page and confirm we can see our Snowflake schemas and datasets.
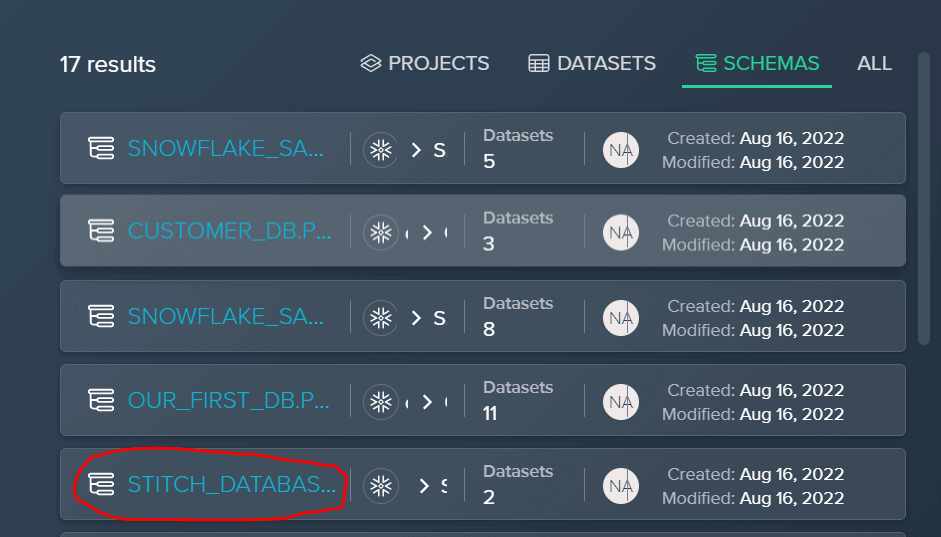
We’re done with the setup now… time to do some modeling on our GA-Snowflake dataset.
⭐ Easily transforming and modeling our GA4 datasets
Let’s now try out some simple modeling steps using Datameer.
In our example, we have decided to do a simple transformation, filtering out any dates after the year 2021.
The first step is to:
1. Create a Project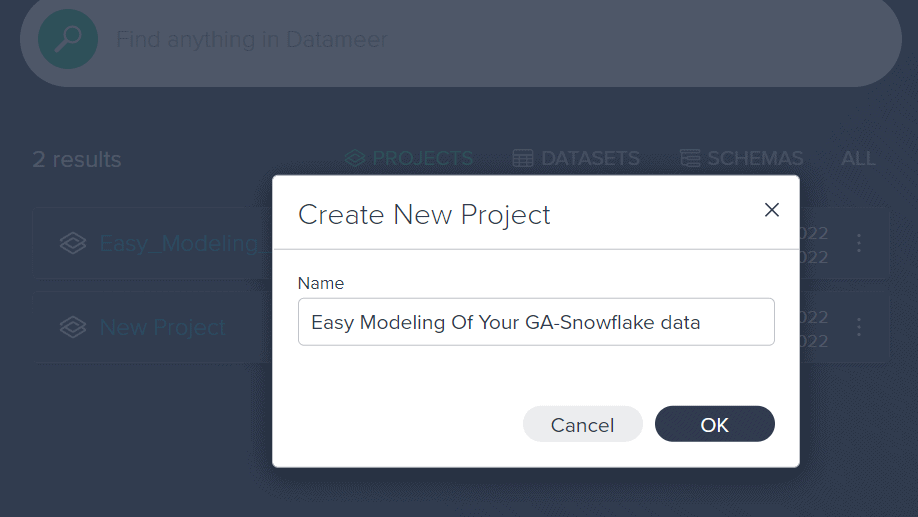
Select the schema housing your GA4 data.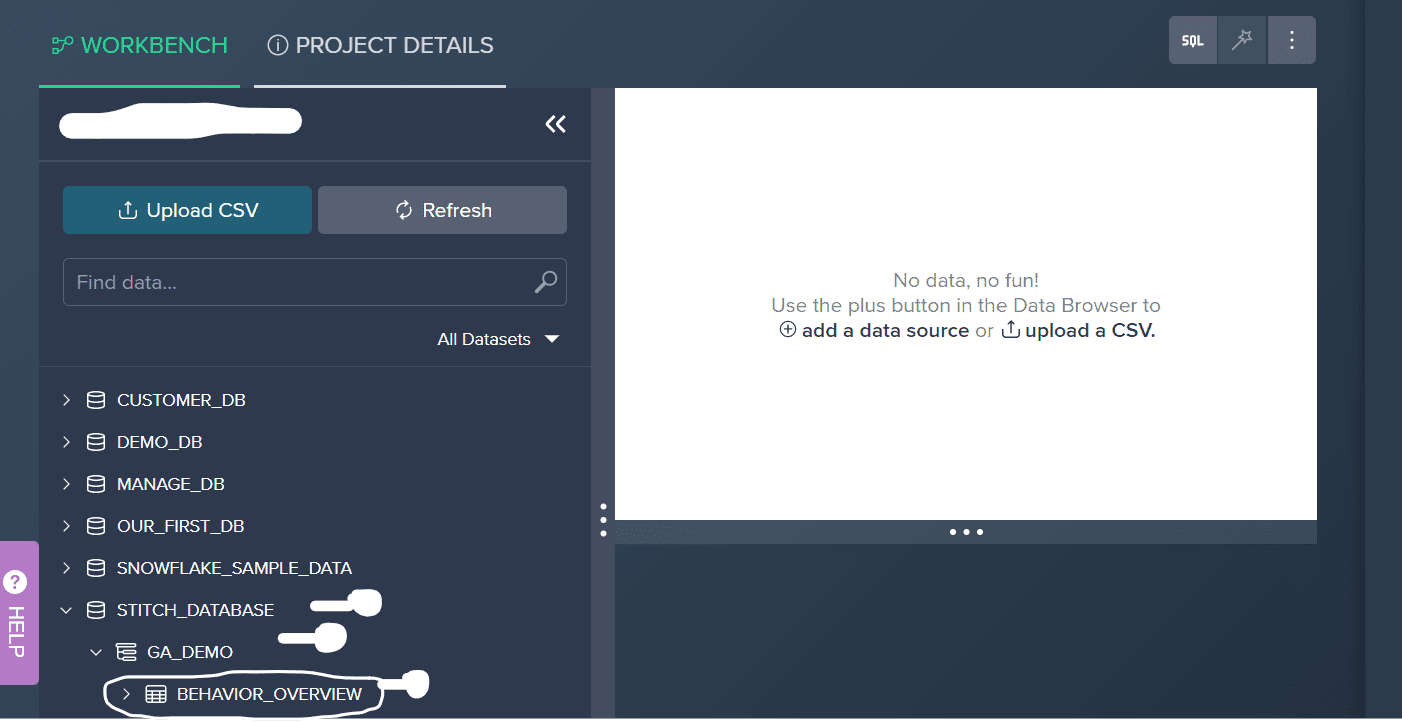
2. Perform Transformations efficiently: Inline with our example, we have decided to do a simple transformation. i.e filtering our behavior dataset by our ga: date dimension.
To do this:
Click on the filter icon on the gui and input the appropriate parameters.
You will then get a confirmation of the transformation.
Your data has been filtered.
3. Click the icon at the top-right to deploy your changes to Snowflake.
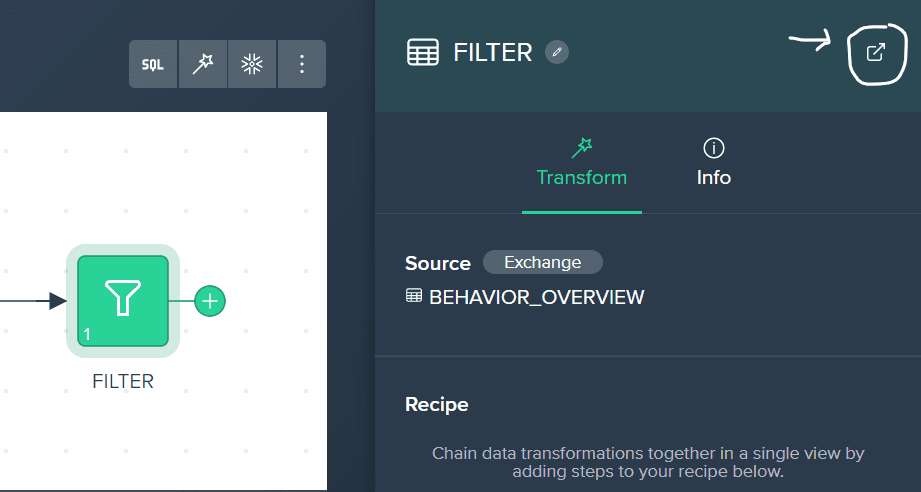
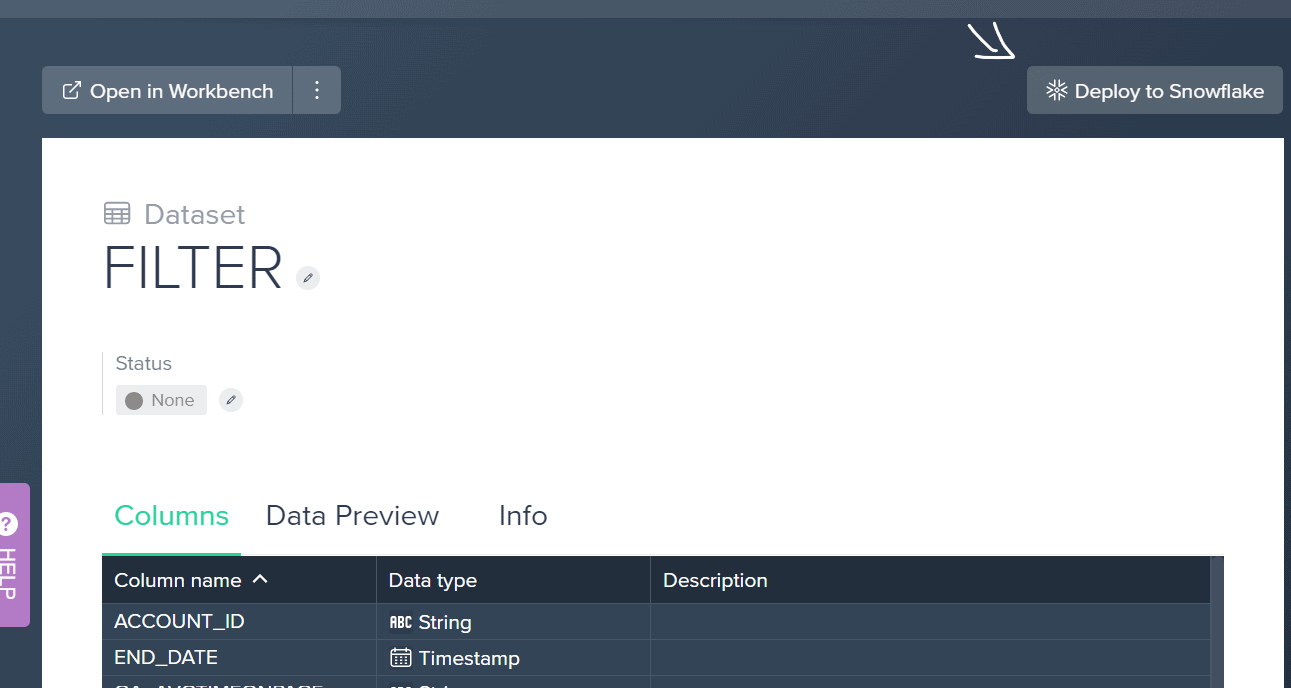
4. Select Your preferred Destination to publish your “transformed data” back into your Snowflake data warehouse.
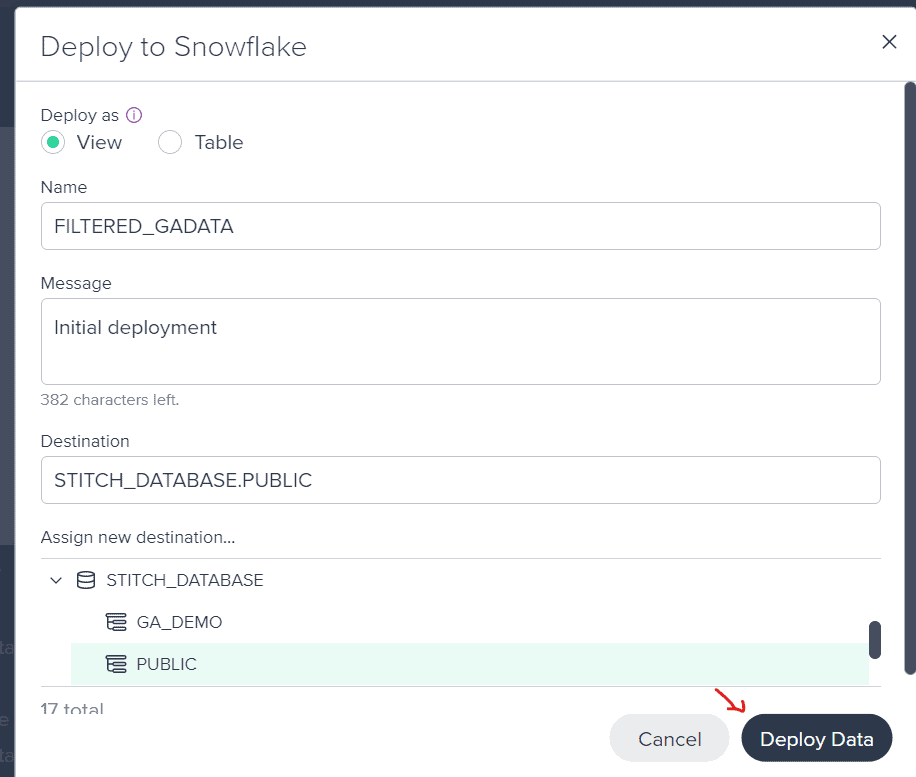
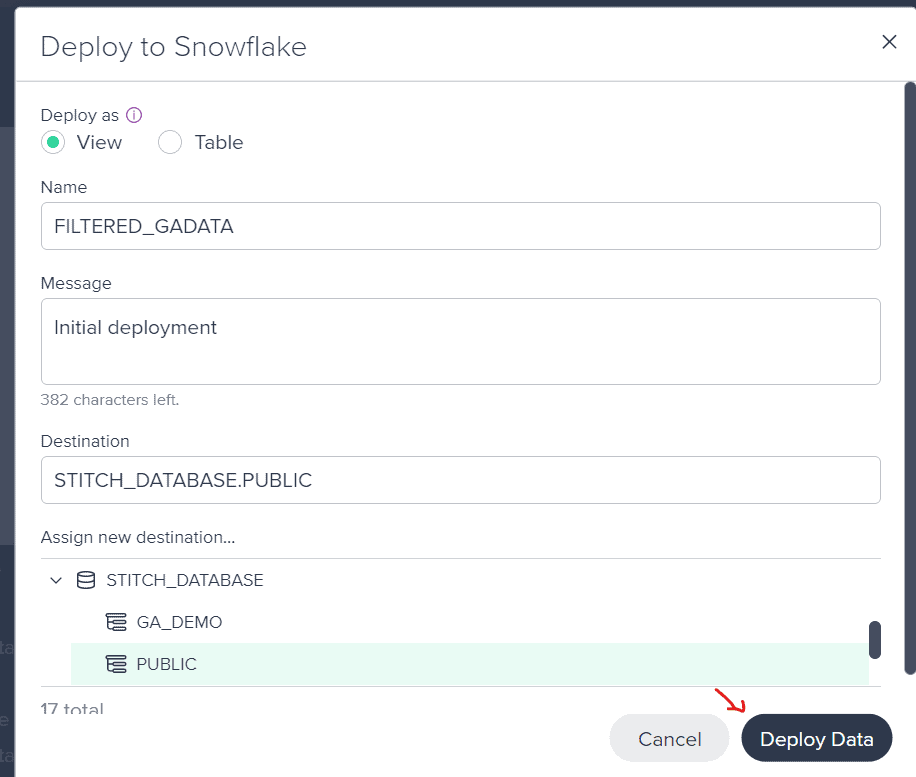
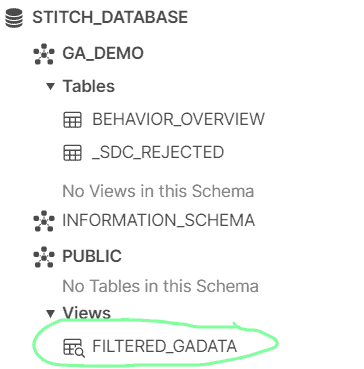
5. Check to ensure your data has been published back into your Snowflake warehouse.
- The green icon on your node dashboard indicates a deployed view.
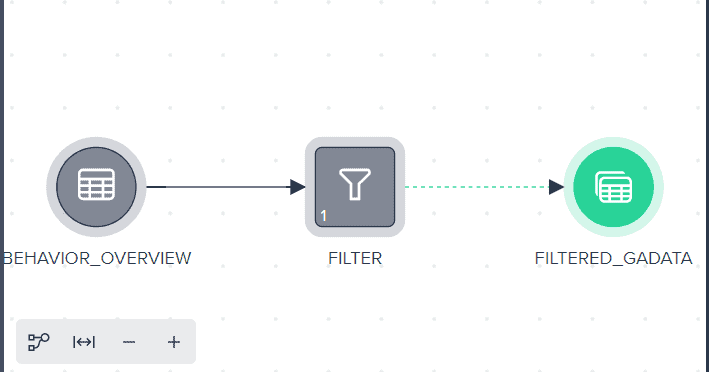
- Notice Our published view is now in our Snowflake database.
There are countless ways we can use Datameer to model our raw datasets. If you want to learn more about Datameer, check out our detailed demos and videos .
In any case, at this juncture, we have a new status update…
Third step – Transformations Complete ! ✅
You know what that means…Another espresso coming right up 😁!
Step 4️⃣: Visualize your GA4 – Snowflake Data In Power BI .
With so many data visualizations, BI features, and tools, power BI has become a go-to for many analysts.
Well, we’re one of those analysts.
We will complete our analysis cycle using power BI with visualizations and ad-hoc analysis.
Are you set?
Let’s dive into visualizing our data in Power BI!
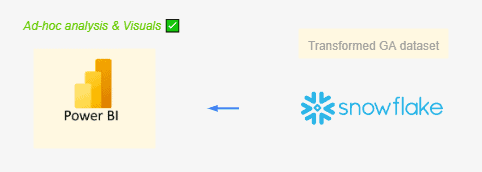
A quick tip: The prerequisite to understanding this section is a basic knowledge of the Power BI Platform.
⭐ Connecting to Snowflake from Power BI.
- Access your Power BI interface.
- Select “get data” and choose Snowflake.
- Click Connect
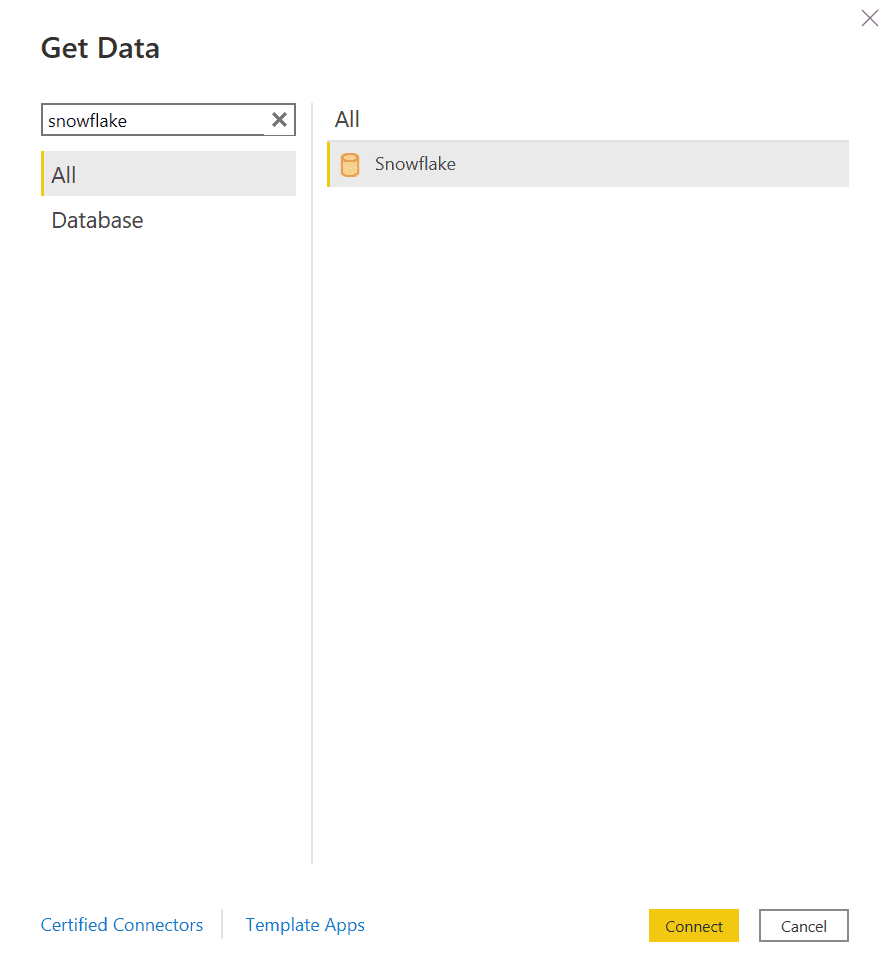
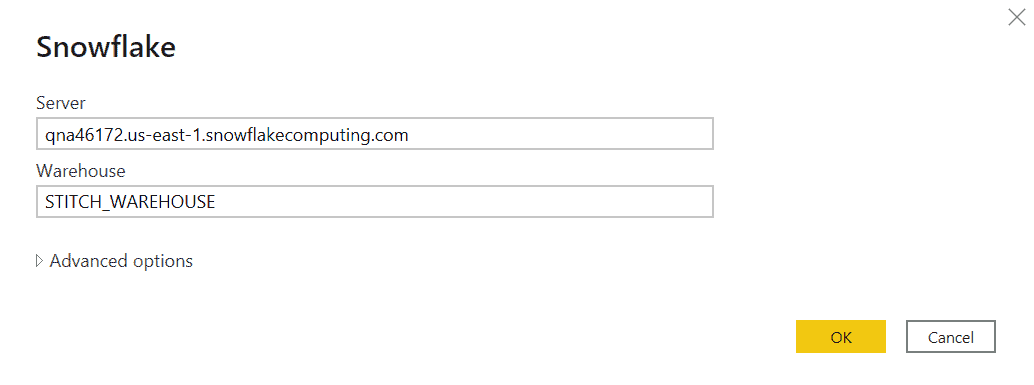
- Specify your hostname and warehouse. (Exclude the https)
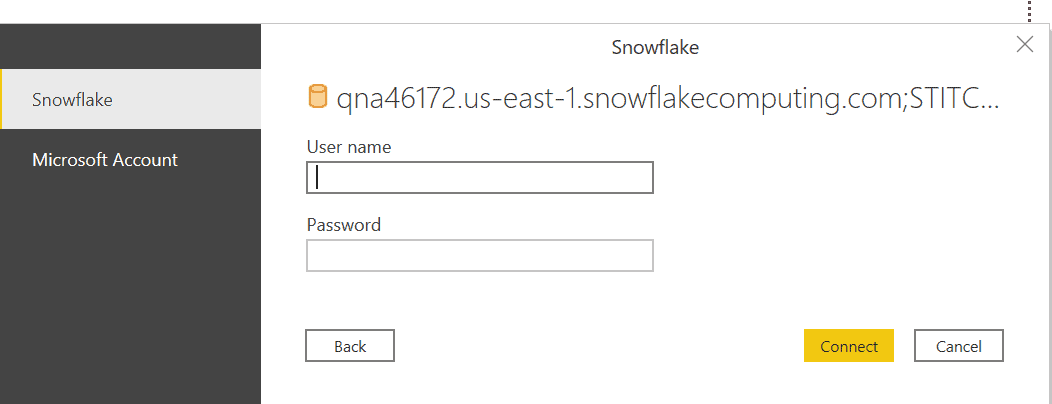
- Specify username and Password
- If everything checks out, you should be able to see your Snowflake data in Power BI.
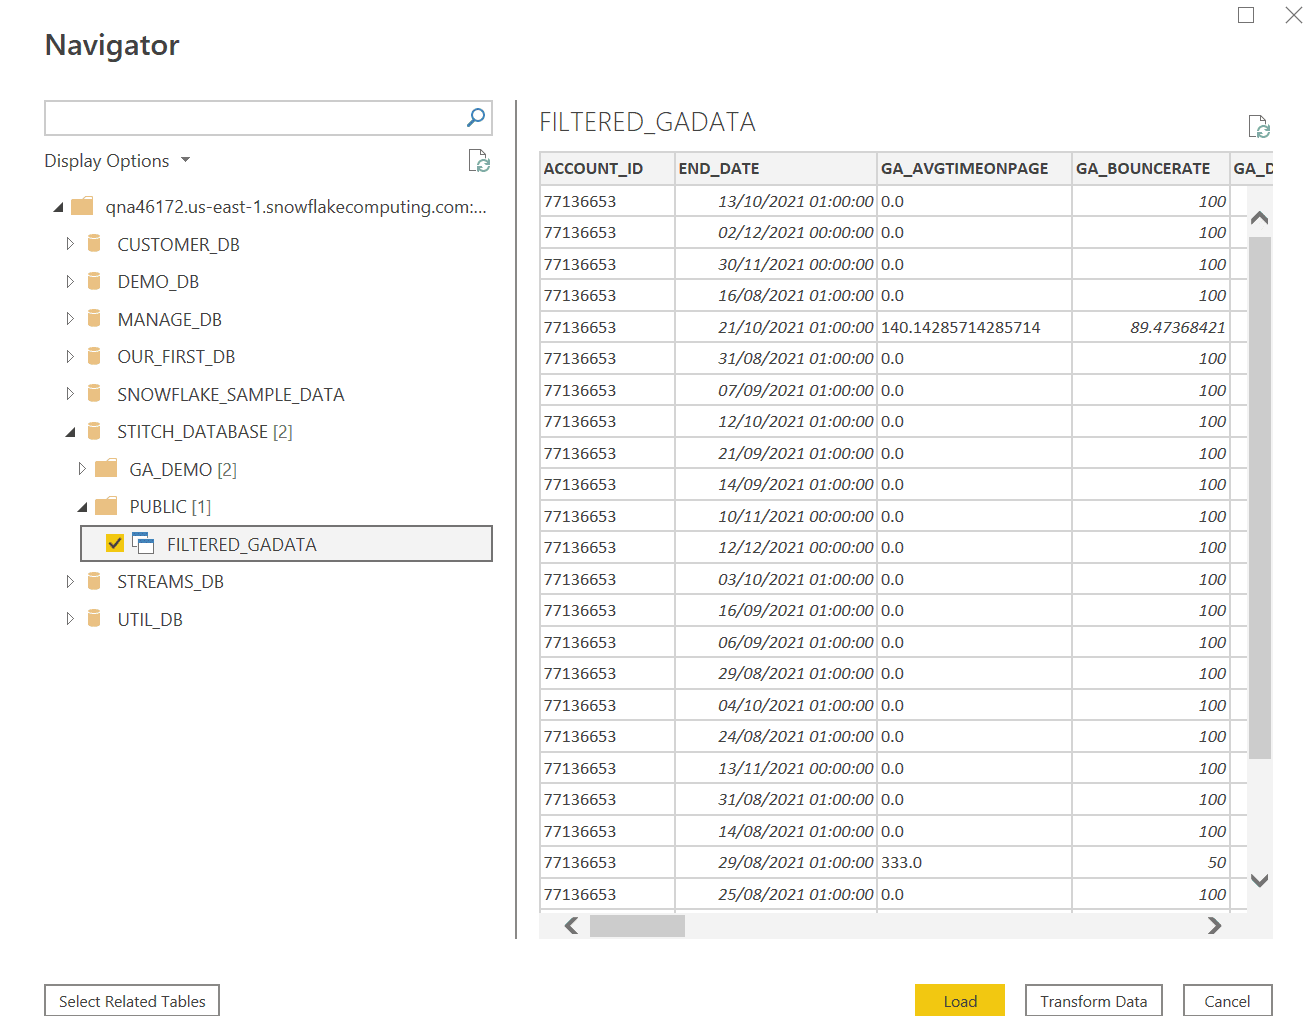
- Specify your transformed view (the view we just transformed using Datameer) and click Load or transform.
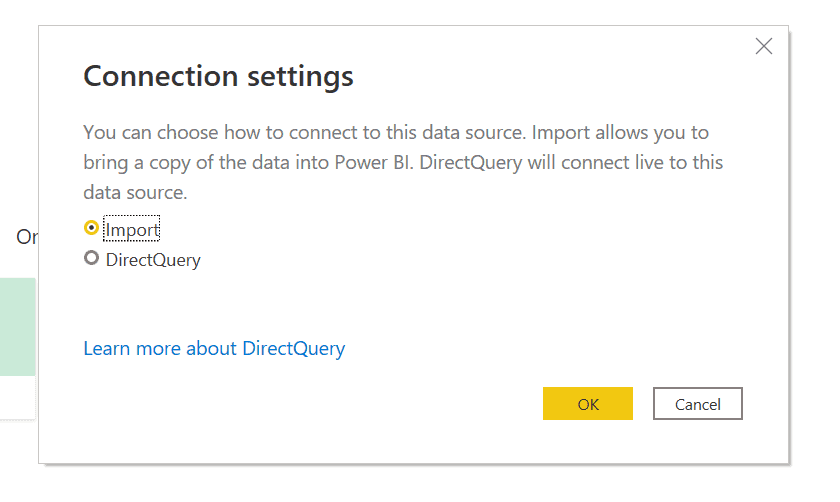
- Select your preferred connection type
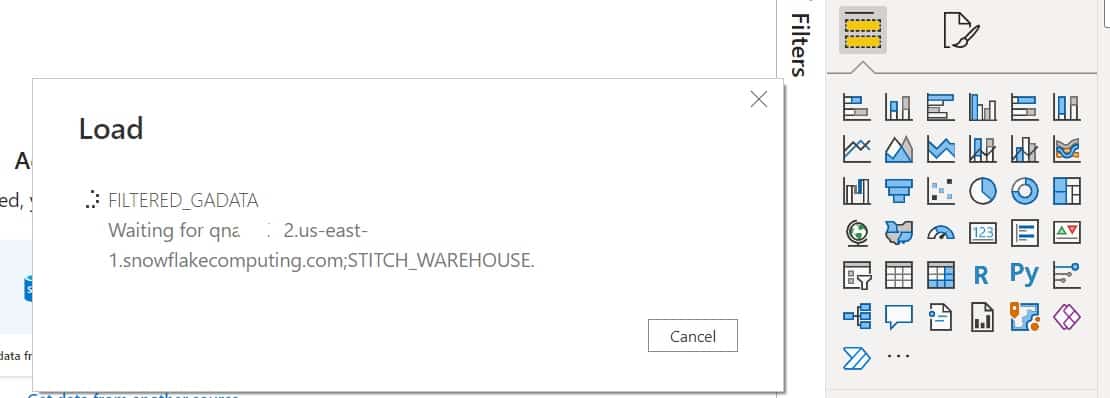
- Once data is fully loaded, we can begin building visualizations on our behavior data.
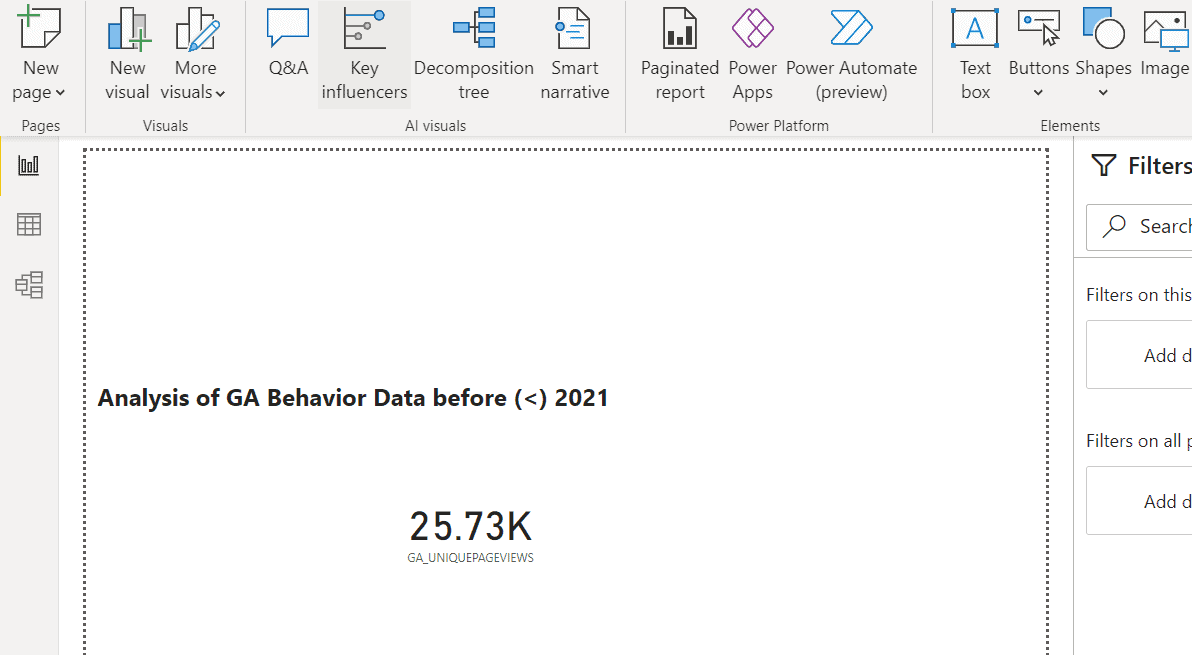
Drum roll, please..
Final Status update Alert 😉
Extract, Load, transform and Visualize – Complete ! ✅
WRAP-UP
And that’s it.. we’re all done!
This tutorial demonstrated how a marketing analyst like you and I could take data from GA4 and move it seamlessly into Snowflake.

We also showed how to perform self-service BI with tools like Datameer and Power BI.
We hope you found this helpful, and if you did, please feel free to keep using Datameer’s free trial to get your analytics into Snowflake!


