Snowflake Time Travel
- How-Tos FAQs
- September 20, 2020

One of the most interesting Snowflake features is Time Travel. The Snowflake Time Travel feature helps to go back in time within any defined retention period and view or retrieve data as it was. It is a compelling and almost magical feature that pretty much helps to recover lost data, create backup/debugging points in data, and view CDCs over time.\
“ Snowflake Time Travel enables accessing historical data (i.e., data that has been changed or deleted) at any point within a defined period.” – Snowflake
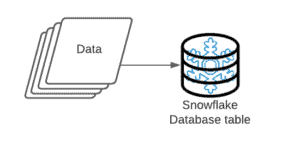
Let’s understand Snowflake’s Time Travel feature by a quick example – insert data into a Snowflake database table. In the backend, Snowflake will partition the data, compress them, and store them in the cloud storage (you’ve chosen when creating the account) in F3 proprietary format.
We’re considering a permanent table with a retention period of a couple of days for this exercise.
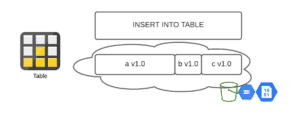
Here we see three partitions, a, b, and c, compressed and stored in our public cloud storage as part of our table. These partitions are of different lengths depending on the volume of compressed data being stored within each partition. It is our initial data load into our table with version 1.0 for all three partitions, as seen above.
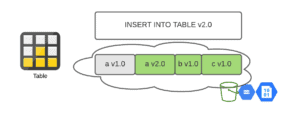
Now, we’re going to make some additions to the table by way of another insert statement, v2.0. Coincidentally, this creates a new version of partition a, i.e., v2.0. So in the backend, we now have the older v1.0 and the newly created v2.0 for partition a.
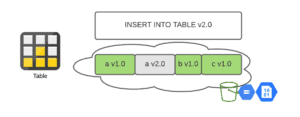
Please note, if you run a simple
SELECT * FROM table;the statement, the query will default to the latest partitions always, in this case, partitions a v2.0, b v1.0, and c v1.0, as highlighted.
Now, if we’d like to go back into the past and see what v1.0 looked like for partition a, we could easily run a query as below
SELECT *

FROM table
AT (OFFSET => -60*5);
This query has an ‘Offset’ parameter that helps to go back in time (-60*5 seconds in this case) to retrieve the previous version of the dataset within the retention period.
Another approach is to use the ‘Timestamp’ parameter to go back in time to a specific timestamp within the retention period:
SELECT *
FROM table
BEFORE (TIMESTAMP => 'Mon, 13 September 2021 12:00:00 -0700'::timestamp_tz);
The query above uses the ‘Timestamp’ parameter to go back to ‘Mon, 13 September 2021 12:00:00 -0700’.
The final approach and something supremely powerful is to go back in time to before a specific query was fired on the Snowflake data warehouse:
SELECT *
FROM table
BEFORE (STATEMENT => '8e5d0ca9-005e-44e6-b858-a8f5b37c5726');
The query above uses the ‘Statement’ parameter to go back in time to before the
query id = ‘8e5d0ca9-005e-44e6-b858-a8f5b37c5726’ was fired.
Now that we have basic information on how the Snowflake Time Travel feature works with the retention period, let’s move on to the Drop and Undrop features that work on top of Time Travel.
But first, let’s create the associated database and table, as below:
--Using appropriate role to create objects
USE ROLE SYSADMIN;

--Create a new database TEST_1
CREATE OR REPLACE DATABASE TEST_1;

--Be sure to select database and its underlying default schema for use
USE DATABASE TEST_1;
USE SCHEMA PUBLIC;

--Insert sample records into Orders table
INSERT INTO orders
SELECT 1,'08/01/2021','Mike Engeseth','Austin',10000
UNION ALL
SELECT 2,'08/02/2021','Mike Jones','Dallas',20000
UNION ALL
SELECT 3,'08/03/2021','John Engeseth','Boston',5000
UNION ALL
SELECT 4,'08/04/2021','Michael Engeseth','Austin',15000
UNION ALL
SELECT 5,'08/05/2021','Mike Coulthard','Boston',7000;

--Get the current timestamp value
SELECT CURRENT_TIMESTAMP();
--2021-09-15 07:48:01.371 -0700

--Insert sample records into Orders table
INSERT INTO orders
SELECT 6,'08/06/2021','Paul Engeseth','Austin',25000
UNION ALL
SELECT 7,'08/10/2021','Andrew Engeseth','Dallas',15000
UNION ALL
SELECT 8,'08/11/2021','Mike Shelby','Dallas',2000
UNION ALL
SELECT 9,'08/20/2021','Robert Engeseth','Boston',1000
UNION ALL
SELECT 10,'08/25/2021','Peter Engeseth','Austin',500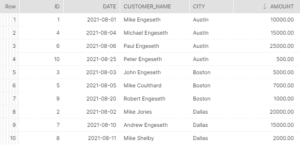
--View the data
SELECT *
FROM orders
ORDER BY city;
The above code will make the required database and table, insert sample records into the table, and display a quick view of the inserted records.
The dataset is a sample set of product transactions within 3 cities in the United States by 10 unique customers on specific dates.
So far, we’ve created the database and table and inserted some data. As we have learned previously, this stores data in the form of compressed partitions in the backend within our public cloud storage.
Let’s drop the above-created table first:
DROP TABLE TEST_1.PUBLIC.orders;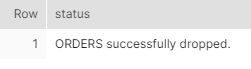
If you’d like to see if this table ever existed and is now dropped, run the following command:
SHOW TABLES HISTORY like '%ORDERS' in TEST_1.PUBLIC;![]()
Specifically, check the two timestamps, i.e., ‘created_on’ and ‘dropped_on’ columns.
To retrieve this table, let’s quickly run the following statement:
UNDROP TABLE TEST_1.PUBLIC.orders;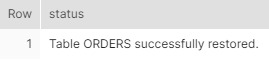
The data has been successfully retrieved.
Finally, we will now use the timestamp that we had saved earlier, i.e. ‘2021-09-15 07:48:01.371 -0700’. It was the time from before our second insert statement. Let’s try to get a view of the table at this time. Essentially, a view of the table before it had all data.
SELECT *
FROM TEST_1.PUBLIC.orders
AT(timestamp => 'Wednesday, 15 September 2021 07:48:01.371 -0700'::timestamp_tz);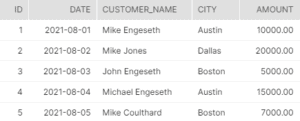
One important thing to note here is that the table was dropped and undropped, yet the Time Travel history is maintained. This is such an effective safety measure that Snowflake offers and has incredible capabilities that are unmatched by its competitors.
Finally, we would go ahead and create a clone of this table for safekeeping as below:
CREATE OR REPLACE TABLE TEST_1.PUBLIC.restored_orders clone TEST_1.PUBLIC.orders
AT(timestamp => 'Wednesday, 15 September 2021 07:48:01.371 -0700'::timestamp_tz);
This brings our discussion on this unique feature from Snowflake to an end.