From Snowflake to Looker: A Step-by-Step Guide to Efficient Data Migration
- Ndz Anthony
- July 1, 2023

In a modern data-driven business landscape, efficient and effective data transformation is not merely an option; it’s a necessity. One such critical transformation journey is migrating data from Snowflake, a market-leading cloud data platform, to Looker Studio, a top-tier data exploration and visualization solution. This process, while vital, can pose challenges. Fortunately, these can be readily surmounted with the right tool: Datameer.
As reported by Dataversity, data scientists spend approximately 60% of their time preparing data, representing a significant opportunity cost. The adoption of a powerful data transformation tool like Datameer not only mitigates this cost but also elevates the overall data analysis process.
In this article, we provide a detailed, step-by-step guide to efficiently transferring and transforming your data from Snowflake to Looker using Datameer. Our goal is to provide clear, practical insights that will empower you in your data migration journey.
Without further ado, let’s delve into the process.
Prepping Your Data in Snowflake
Before beginning any data migration process, it is crucial to adequately prepare your data. This preparation can significantly impact the success of the data transformation journey from Snowflake to Looker. Here, we highlight key preparatory steps using Datameer.
- First, it’s essential to assess your data in Snowflake to understand its current structure. Datameer provides capabilities for data profiling, which help you to identify any anomalies or inconsistencies in your data early in the process.
- Secondly, cleaning your data is of utmost importance. This includes handling missing values, incorrect entries, and potential outliers. Datameer offers data cleaning functionalities that ensure your data is in the best shape possible before migration.
- Lastly, consider the final data structure that Looker requires for optimal performance. You may need to restructure your data in Snowflake accordingly. Luckily, Datameer makes this task manageable with its data reshaping capabilities.
By giving attention to these preparatory steps, you’ll set a solid foundation for successful data migration from Snowflake to Looker.
How to import Data from Snowflake to Looker
Shifting data from one platform to another can often feel like navigating through a maze. However, with Datameer as your compass, the complex twists and turns of data migration become a straightforward journey. Let’s embark on this expedition from Snowflake to Looker, one step at a time.
Step 1: Establish Connection with Snowflake Database:
- First, log into your Datameer account
- To sign in to your Snowflake account, click on the “Snowflake” icon. The login dialog opens. Fill in your “Snowflake username” and “Password” and confirm with “Sign in to Snowflake”. You are logged in to your Snowflake account and can view the current login data when hovering the Snowflake icon.
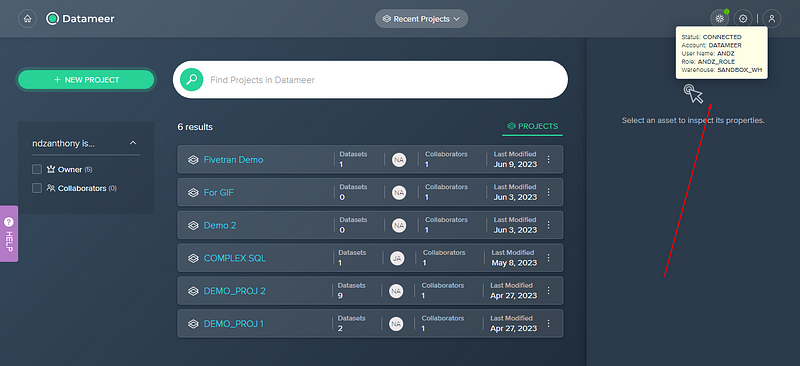
Step 2: Choose Your Desired Data:
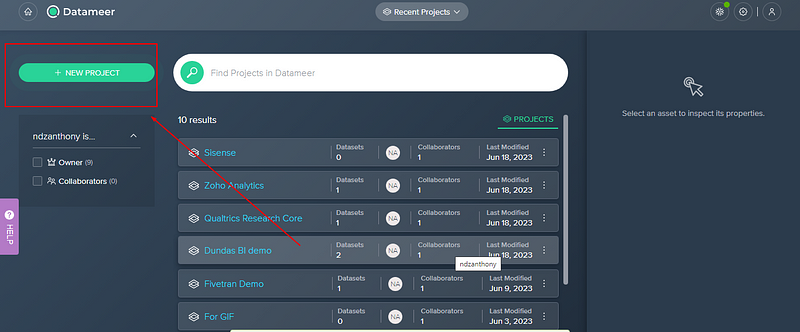
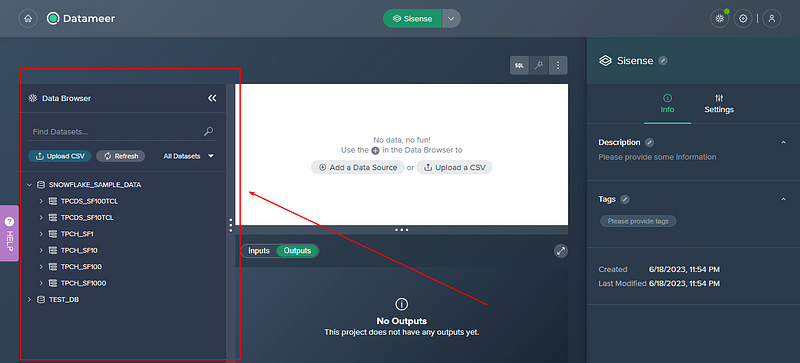
- Navigate to the “New Project”, create a new project. A list of all available tables in your Snowflake database will appear.
- Choose the tables or specific data that you wish to migrate.
Step 3: Transform and Prepare Your Data:
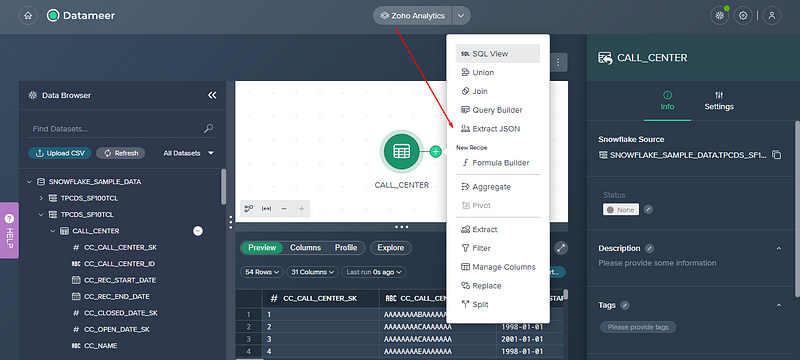
- Use Datameer’s functionalities to clean and transform your data.
- With functions like TRIM, REMOVE, and REPLACE, you can modify string data, while mathematical functions such as ROUND and ABS let you adjust numerical data. You can also use the SPLIT and JOIN functions to alter the structure of your data to fit Looker’s requirements.
Step 4: Configure Google Sheets as Your Intermediate Target:
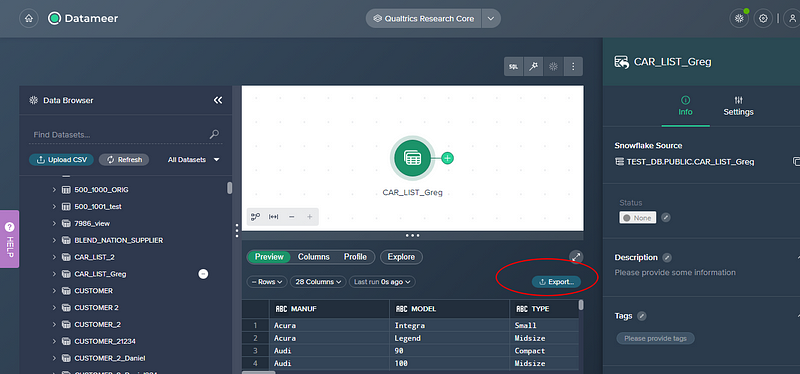
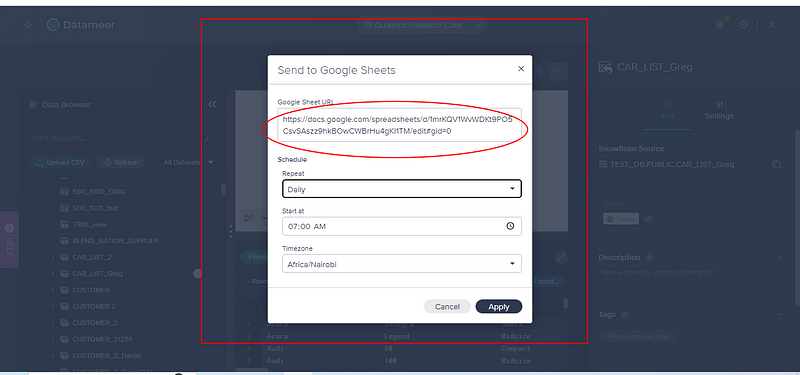
- Once your data is prepared, navigate to the “Export” section of your workbook. Select “Export,” then choose “Google Sheets” from the dropdown menu.
- Enter the URL for your Google Sheets account, which specifies the target sheet where you want your data to go.
- Just fill the other fields respectively and click apply.
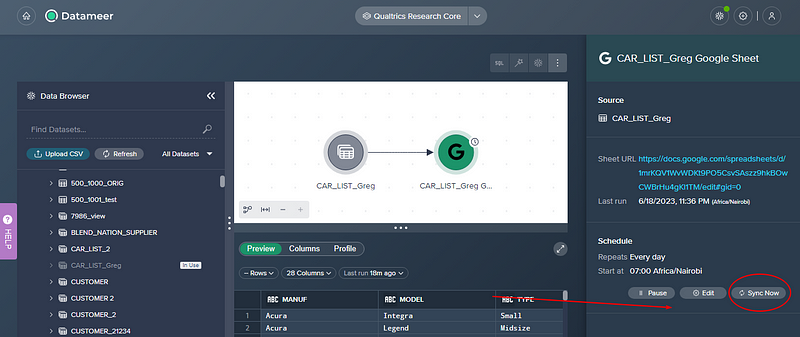
- Click “Sync now” to immediately avail the Data in the google sheet.
Step 5: Import Data from Google Sheets to Looker:
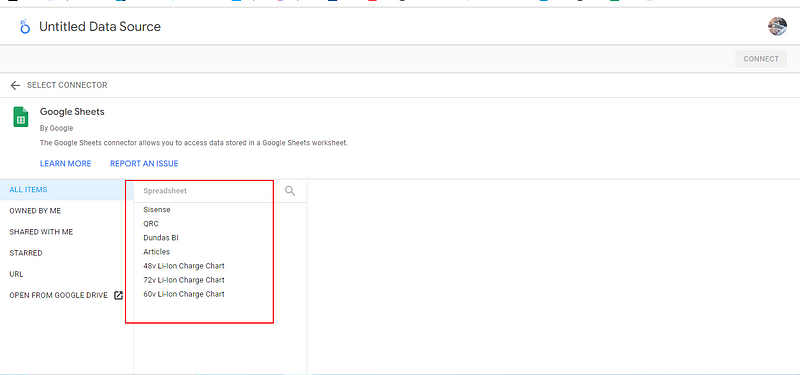
- After your data has been successfully exported to Google Sheets, you can now import it into Looker. To do this, you need to create a new connection in Looker to your Google Sheets account. Simply use the simple Looker User interface to connect google sheet to Looker as a data source.
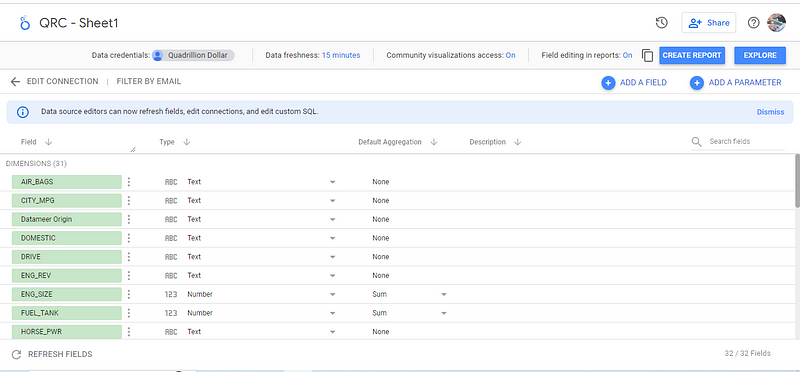
- From Looker, you should be able to see all your sheets that you have created.
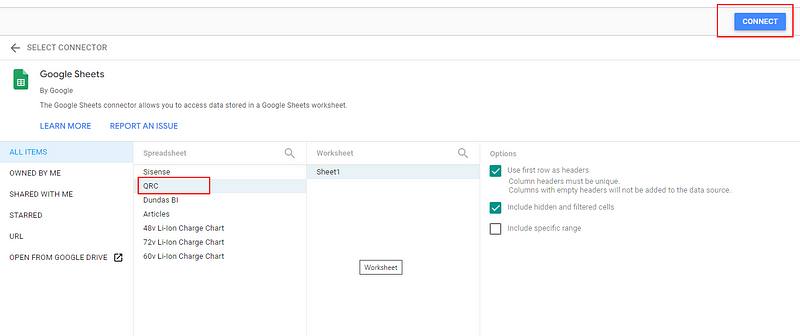
- Select the google sheet with the Data you exported from Datameer and just hit “Connect”.
- Once the connection is established, you can import the data from the specified Google Sheets into Looker.
- And you have successfully moved data from Snowflake to Looker Studio. You can now go ahead and explore it
Step 6: Validate Your Data in Looker:
- After the import job is complete, log into your Looker account and navigate to the target table. Verify that the data has been transferred accurately and completely.
Snowflake to Looker Migration FAQs: What You Need to Know
Data migration is a task that comes with its fair share of questions and potential roadblocks. Let’s take a moment to address some of the most frequently asked questions about migrating data from Snowflake to Looker using Datameer.
Q1: How Can I Avoid Data Corruption During Migration?
Datameer provides automatic data validation checks to counteract potential data corruption. In case any corruption is detected, the system will attempt to re-fetch the data, ensuring its accuracy and integrity.
Q2: How Can I Improve Data Transfer Speed?
Datameer uses advanced optimization algorithms that maximize data transfer efficiency, effectively minimizing the time spent on the migration process.
Q3: How Do I Handle Inconsistent Data Types Between Snowflake and Looker?
Datameer allows users to manually specify data types for each column before the transfer, thereby ensuring compatibility between the platforms.
Q4: How Do I Map Complex Relationships in My Data?
Datameer’s visual data flow interface simplifies the mapping of complex relationships in your data, making it easier to define these relationships during the transfer.
Now, you’re better prepared to navigate any potential hurdles in your data migration journey. As always, thorough preparation and validation are key to a successful migration process.
