Testing and Troubleshooting Datameer on AWS
Health Check
Once the stack is created and the Datameer instance is launched, log into Datameer Enterprise, and open the default workbook preloaded in Datameer. If the default workbook can be accessed, Datameer is running properly.
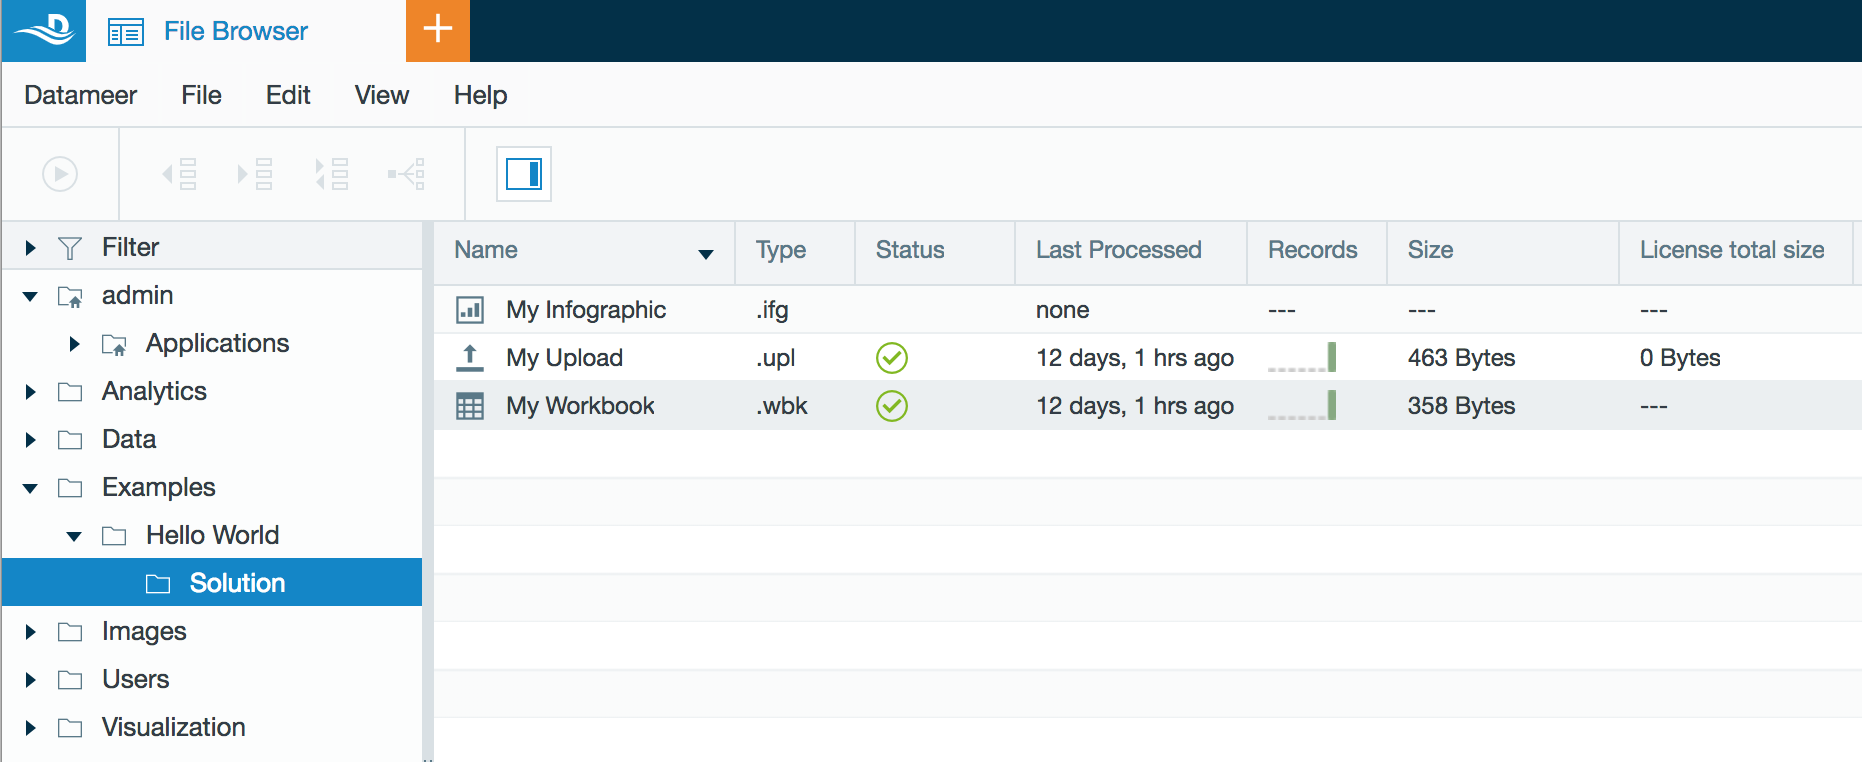
How to open the preloaded workbook:
- In the File Browser, navigate through the folders Examples → Hello World → Solution
- Double-click on the My Workbook file.
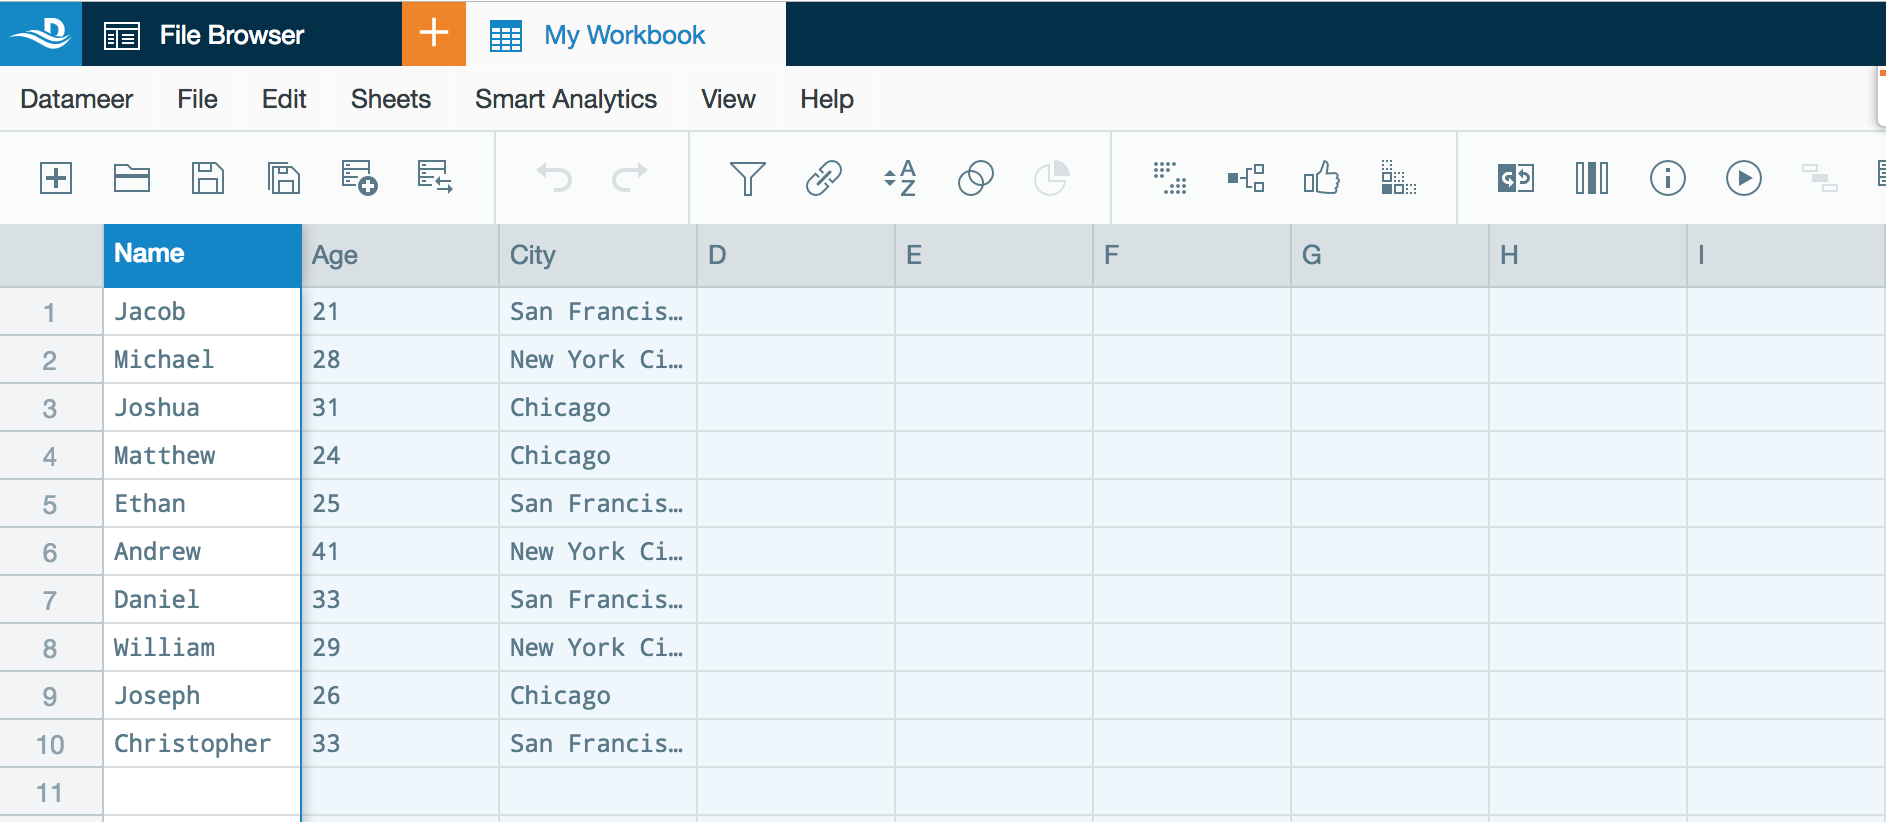
3. My Workbook should load as a new workbook tab:
Monitoring
Once Datameer Enterprise has launched on AWS, you can monitor, start/resume job execution, and view system statistics via the Datameer System Dashboard.
You can also utilize a variety of AWS tools to monitor your Amazon EC2 instances to maintain reliability, availability, and performance of the Datameer service. Visit Monitoring Amazon EC2 for more information.
Troubleshooting
If the Datameer landing page is not being displayed after installing Datameer Enterprise, follow these steps to restart the Datameer service:
Datameer Enterprise version 7.2.8.1
SSH into the Datameer instance. For instructions on how to connect to your instance via SSH see Connecting to Your Linux Instance Using SSH.
Check to see if the service is running. From the command line run the following command to view the PID and current state of the instance.service conductor status
- Check the log file for any error or warning messages. The log files are located in /opt/datameer/current/logs
- Restart the service:
To stop the service, run this command:
sudo service conductor stop
To start the service, run this command:
sudo service conductor start
Datameer Enterprise version 7.4.4.1
SSH into the Datameer instance. For instructions on how to connect to your instance via SSH see Connecting to Your Linux Instance Using SSH.
Check to see if the service is running. From the command line run the following command to view the PID and current state of the instance.ps -ef | grep datameer
- Check the log file for any error or warning messages. The log files are located in /opt/datameer/current/logs
- Restart the service:
To stop the service, run this command:
/opt/datameer/current/bin/conductor.sh stop
To start the service, run this command:
/opt/datameer/current/bin/conductor.sh start
For further help with troubleshooting contact support@datameer.com
Backup and Recovery
Datameer and EMR instances are created with the Elastic Block Stores (EBS) volumes attached. The EBS Volumes are automatically replicated to protect you from component failure, offering high availability and durability. This enabled AWS to perform auto-recovery of the failed EC2 instances without any loss of data.
Datameer Enterprise version 7.2.8.1
Default deployment of Datameer Enterprise includes a local MySQL database ("DAP"). The database contains all metadata information relating to Datameer artifacts and must be backed up prior to upgrade and as part of Disaster Recovery strategy. The database backup should be stored in a location outside the EC2 instance where Datameer is running. Follow step-by-step guides to Backing Up and Restoring Datameer Database.
In case when Datameer instance becomes terminally unavailable (e.g. Availability Zone goes down), the stack would need to be rebuilt from the CloudFormation template. Follow the steps below to rebuild the stack from the CloudFormation Console.
Datameer Enterprise version 7.4.4.1 and above
Datameer Enterprise is deployed in the high-availability environment to protect against component failure. Multi-AZ deployment within a region ensures resiliency of the infrastructure to disruption of a single AZ, so that Datameer will continue to operate in the case when all of the services within a single AZ have been disrupted.
Default deployment of Datameer Enterprise includes a MySQL database ("DAP") that contains all metadata information relating to Datameer artifacts. The MySQL database is abstracted by Amazon Relational Database Service (Amazon RDS) that is deployed in the high-availability environment and automates hardware provisioning, database setup, patching and backups.
Delete Corrupted Stack
- From the CloudFormation console, select the stack that was created originally
- From the Actions menu, select Delete stack.
- The stack now appears in the list of stacks in the CloudFormation console with an DELETE_IN_PROGRESS status.
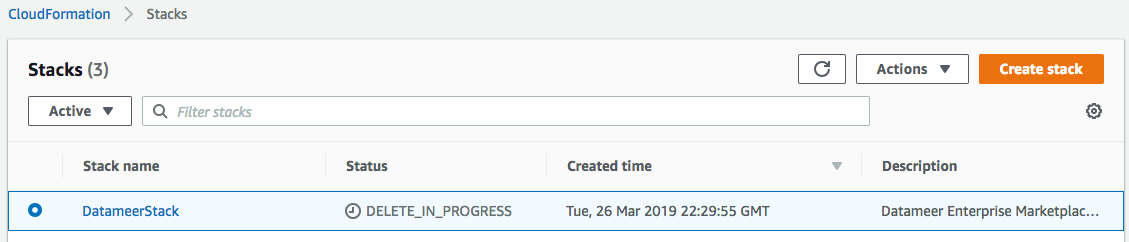
- Once the stack deletion is complete, it disappears from the list.
Create Stack from Template
- Download the CloudFormation template from AWS Marketplace following this step-by-step guide.
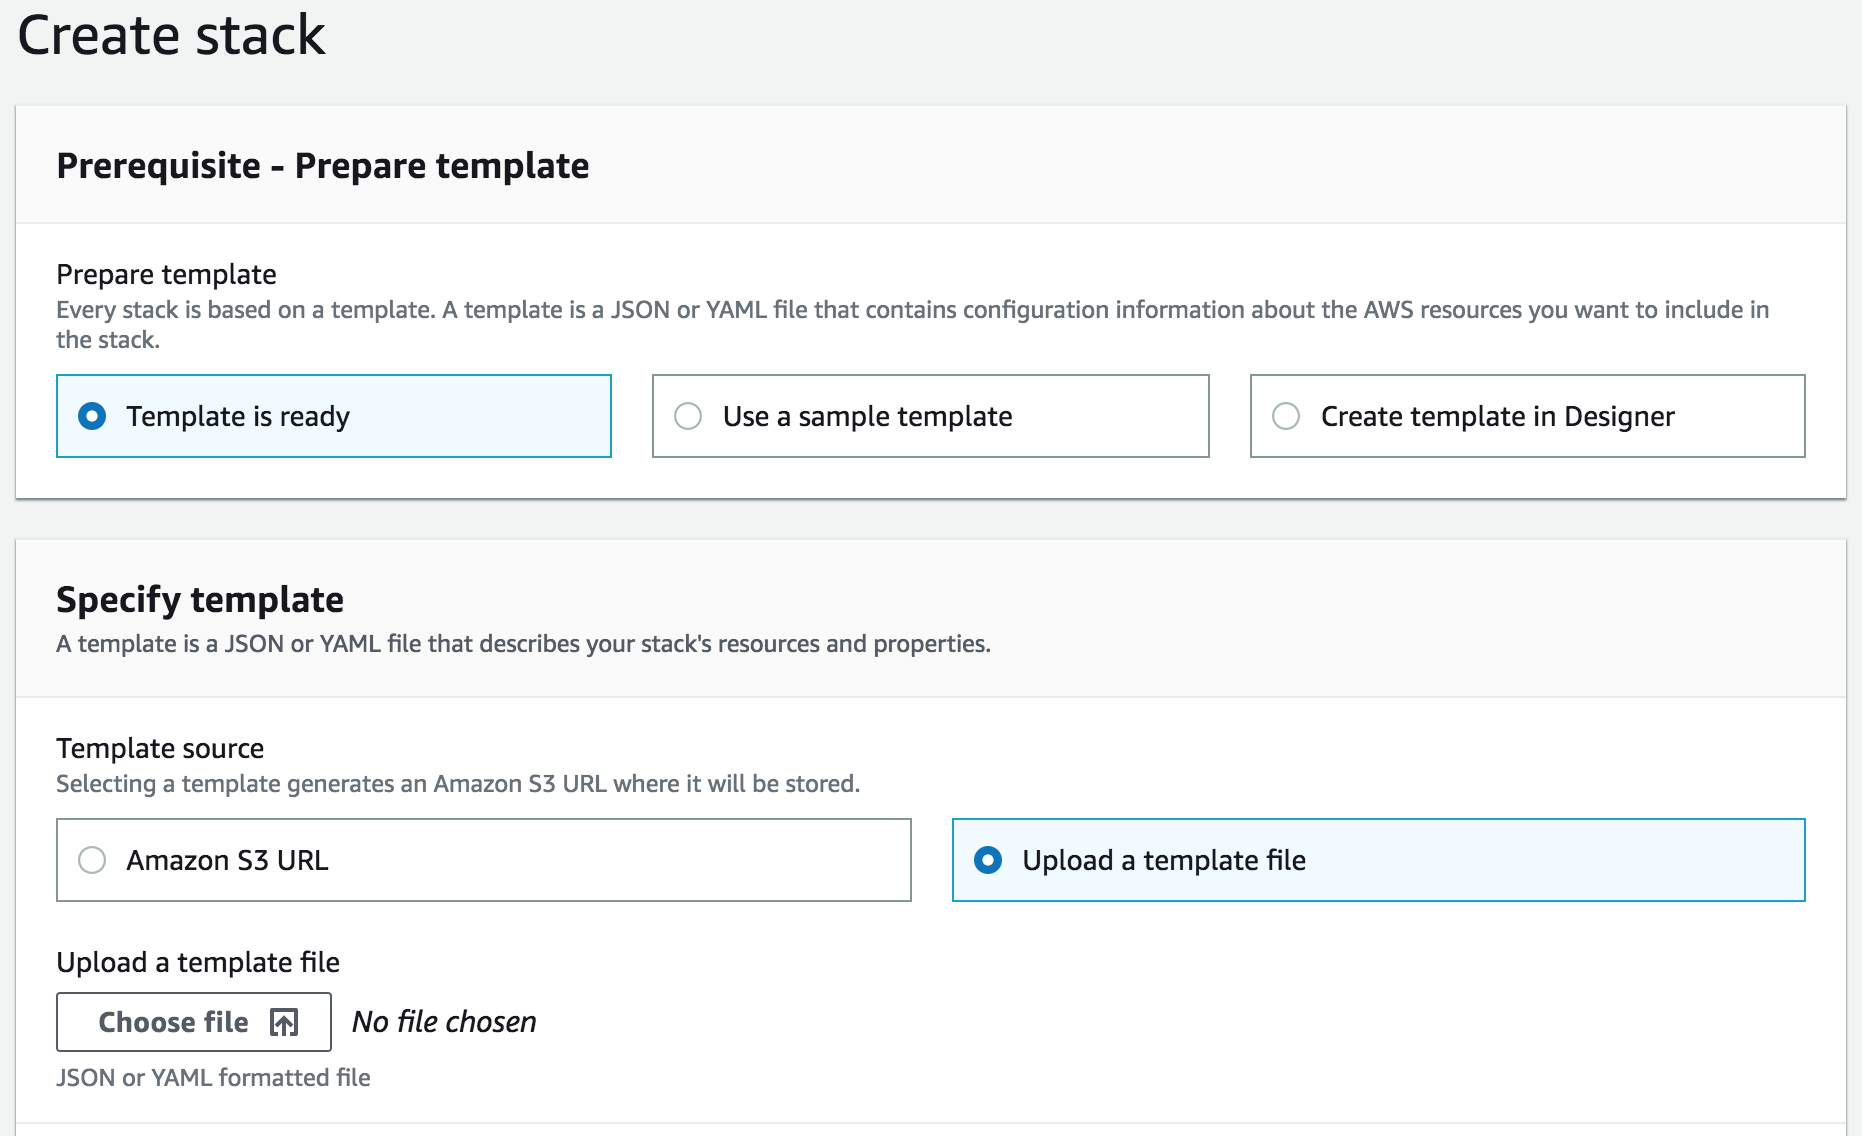
- From the CloudFormation console click Create stack.
- For a Template source, select Upload a template file and choose the file from the local location (previously downloaded from the Datameer Enterprise product listing).
- Follow the rest of the steps for Creating Stack from CloudFormation Template.