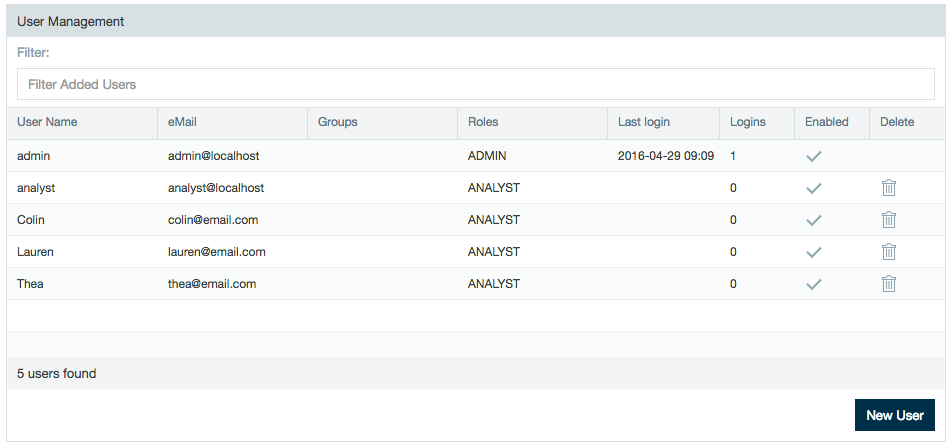
Managing User Accounts
You can create and edit user accounts as well as view when each user has last logged in and each users login count. After you have created the account for new users, send them an email with the URL of the application along with their user name and password.
You should change the admin password as soon as possible. To create a secure password, use a combination of upper and lowercase letters and special characters such as _ or ! or ).
Passwords can be a maximum of 255 characters long.
Filtering User Accounts
The filter bar is located above the listed users. Enter characters to filter the user accounts. The filter box searches for string patterns in the User Name and Email fields.
Creating User Accounts
To create users:
- Click the Admin tab, then click the Users tab on the right.
- Click New User.
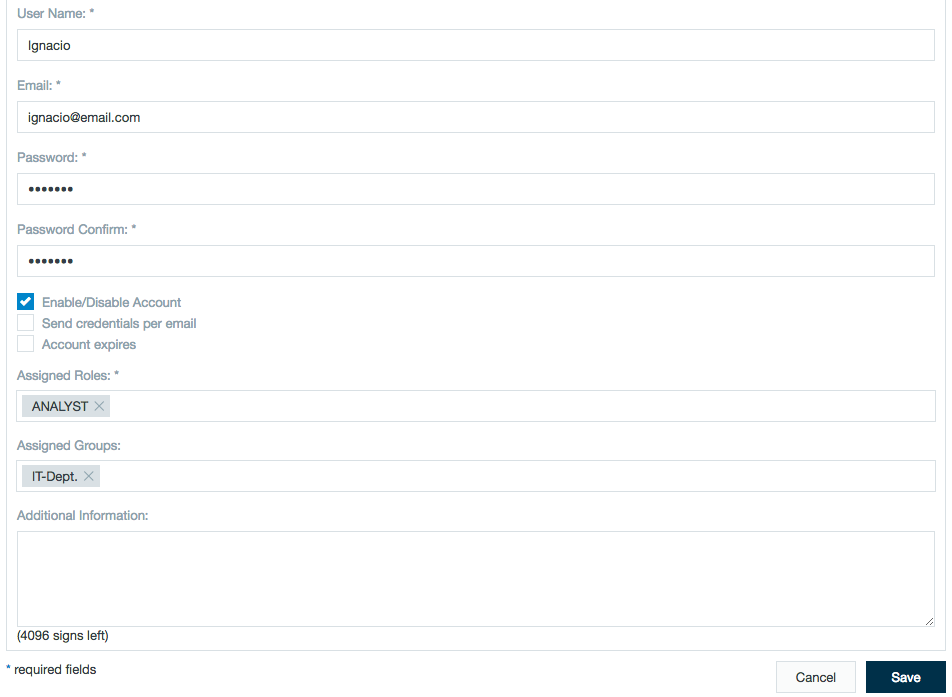
- Enter the user name.
- Enter the user email address. This value is used for sending emails about test failures as well as being a unique identifier for the user account.
- Enter and confirm the password.
- The users account is enabled with a checkmark or disabled when the checkmark is removed.
- Select the checkbox to send them an email with their login information.
- Select the checkbox to give the user an expiration date and set the date for the user account to expire.
- Set permissions by using the arrows to assign a role to the user. (required)
- Optionally, add the user to a group by using the arrows to move a group into the Joined Groups list.
- Click Save.
Editing User Accounts
To edit an account:
- Click the Admin tab, then click the Users tab on the right.
- Click the account name you want to edit.
- Make your desired changes below
- Click Save.
Disabling/Enabling User Accounts
To disable an account:
- Click the Admin tab, then click the Users tab on the right.
- Click the account name you want to edit.
- Deselects the Enabled checkbox to disable that account.
- To re-enable that account, select the Enabled checkbox.
- When you are finished, click Save.
Changing the Default Admin Password
There are two ways to change the administrator user's password. You can follow the instructions above for editing accounts or you can reset the admin user password in the Datameer property files.
To reset the admin user password in the property files:
- Open the Datameer file:
das-env.sh - Remove comment tag on:
# export ADMIN_PASSWORD_RESET=true - Restart Datameer using property
--resetPassword - When Datameer has restarted, the administrator user's password is reset to the default as written in the
default.propertiesfile. - Enter this default password and the admin user's password might then be changed to a new unique password in the user account settings user interface.
- When complete, go back to the
das-env.shfile and comment the line back in so the password doesn't revert to the default upon restarting Datameer.
Deleting a User
To delete a user:
- Select user to delete.
- Click the trash can icon next to the user under the Delete column.
- Click Delete again in the dialog box.
About deleting a user
- The deleted user is no longer able to access the system.
- The user's home directory and all the artifacts (connections, uploads, imports, workbooks, ...) that the user owned stay intact.
- These artifacts are accessible to the Administrator role or any user with the role permission User can see every file and folder.
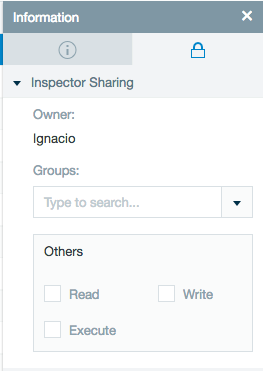
- Artifacts of deleted users can have ownership transferred to an active user and group(s) by selecting artifact and then selecting the permissions section in the information box.