Advanced Filtering Tutorial
Advanced filtering allows you to customize the data displayed in your worksbooks. Filtering also allows you to easily clean up your data to save time on processing and get results faster.
Downloading the Sample Data
Start by downloading the sample data: DeviceData.csv
This data is sample data based on devices and different failure causes.
Creating a File Upload
After you have downloaded the sample data. Create a file upload to bring the data into Datameer.
Narrowing Down the Data
In order to determine your filter, you must know for the criteria you are looking for in your data. You should also be aware that once you decide on what to filter, you might not see any results in your workbook until you run your filter over the entire data set (by running the workbook).
When looking at the DeviceData.csv sample data, you have a column that represents the age of the device in days. In this example, you filter out data based on the age of the device. You then analyze the crash level.
Applying a Simple Filter
Apply a simple filter to the data to get an idea of how an advanced filter works.
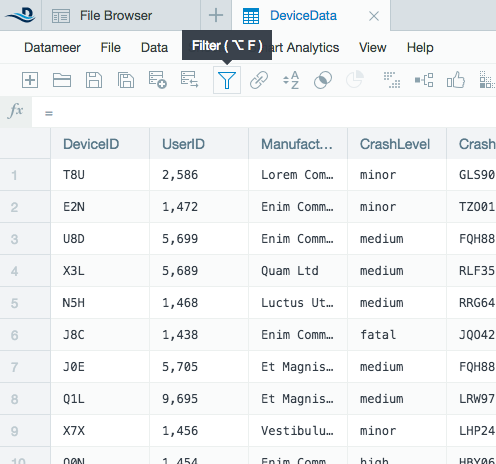
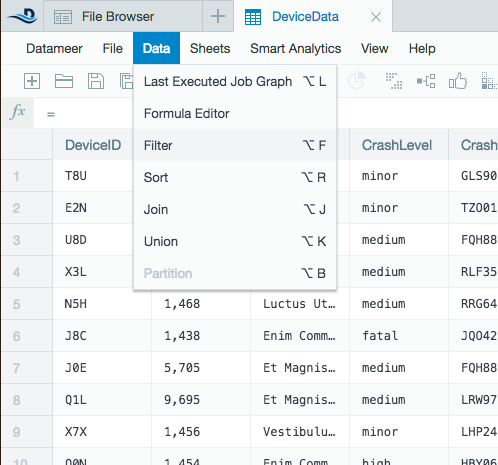
Start by linking the sample data into a new workbook. Select the filter icon on the menu bar or from the drop-down menu:
Once the Apply Filter window opens, select Create filter in new sheet, and then filter to only include any device younger than 30 days and any device older than 60 days.
To add a second filter, click + on the right side of the window. For this particular filter, make sure that OR is selected for the Multiple filters are connected with. You want to use OR since no device can have a greater age of 60 and a younger age of 30.
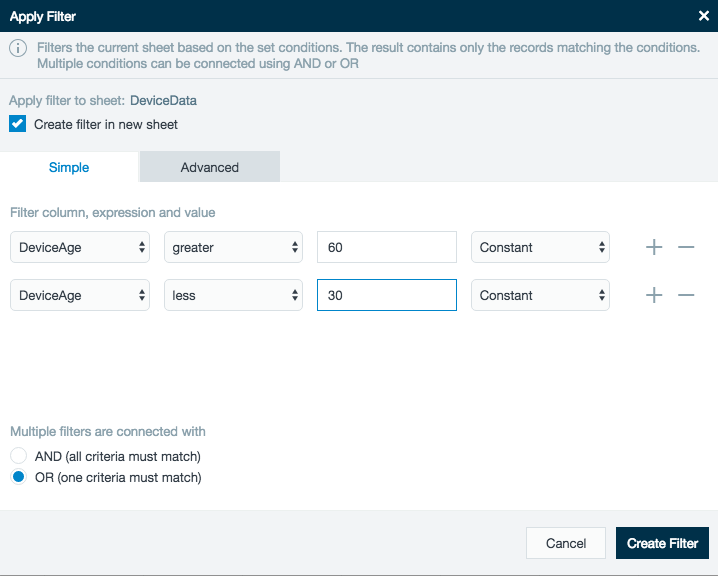
Click Create Filter. Datameer removes any records that don't contain your requirements from the workbook.
Applying an Advanced Filter
Now take a look at the simple filter you created and see how this would be created as an advanced filter.
Make sure you are on your filtered worksheet and click the Filter icon in the menu bar to change/edit your filter. Once you have opened your wizard, select the Advanced tab.
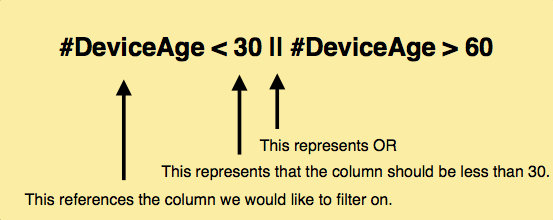
Advanced filters are expression based. Now, manually write the expression for the simple filter you just created: #DeviceAge < 30 || #DeviceAge > 60
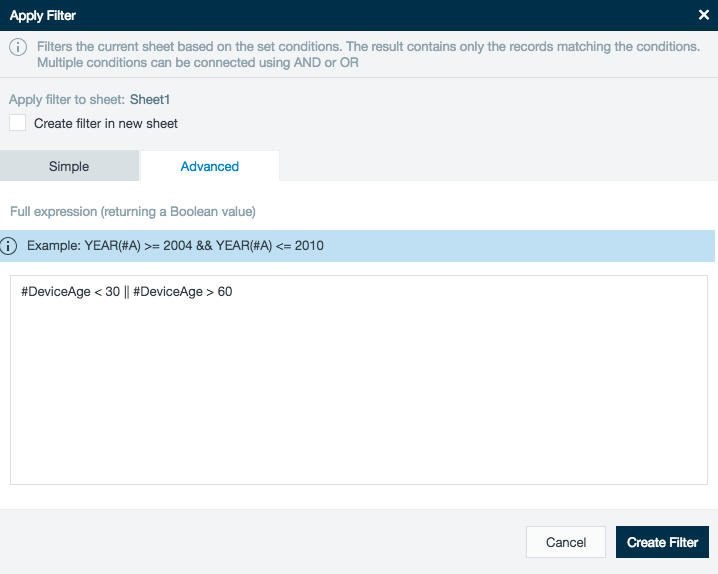
If you click Update Filter, your filter sheet remains unchanged. Now that you have a better understanding on the syntax of filtering expressions, the next task is to write a more advanced filter.
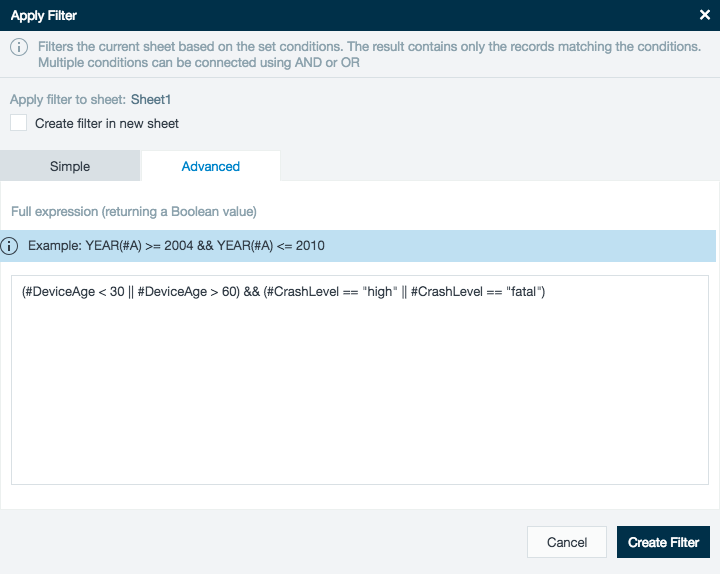
You want to only keep device data for devices younger than 30 days or older than 60 days, but you want to keep the records that have a crash level of high or fatal.
This action requires filtering against two columns: (#DeviceAge < 30 || #DeviceAge > 60) && (#CrashLevel == "high" || #CrashLevel == "fatal")
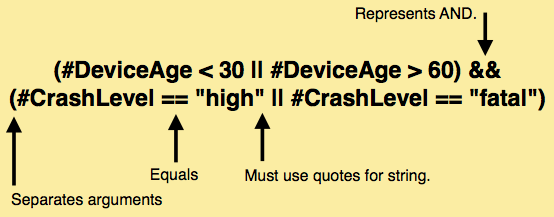
This expression is a little more complicated. Keep the first part of the simple expression the same, but you need to surround it with parentheses. This closes the argument since you add an additional argument. The && represents AND in the expression.
Next, add a second argument by using (. Here, you want the column #CrashLevel to equal (==) high or (||) for the crash level to equal fatal. Make sure you close the argument with ). Writing an expression with a string column value must have quotation marks around the string characters.
Save and run your workbook to see updated results.
Try filtering on more columns or with different values for more practice.