Partitioning Data in Datameer
When importing data using an import job or a file upload, you can partition your data using date parameters. When this data is loaded into a workbook, you can choose to run your calculations on all or on just a part of your data. Also if you decide to export data, you can choose to export all or just a part of your data.
If you are using Microsoft Internet Explorer 7 or 8, these versions don't support Scalable Vector Graphics (SVG). When using partitions in a workbook or when exporting a partition, the simple partition filter isn't available - only the time window and advanced partition filter are available. Refer to Supported Browsers for alternate web browsers.
Partitioning Data During Import Jobs and File Uploads
To use partitions you must first configure your data within an import job, data link, or a file upload. When configuring your job, take into account that the record sample size is per partition. Multiple partitions in combination with large sample sizes may lead to performance issues.
The Define Fields step of an Import Job or File Upload is where you can elect to partition your data.
If your input job is partitioned and you have changed the partition or schema, when you reach the last step of the Import Job wizard, clicking the Save Copy As button in fact does not re-import the data, rather it triggers a migration job instead.
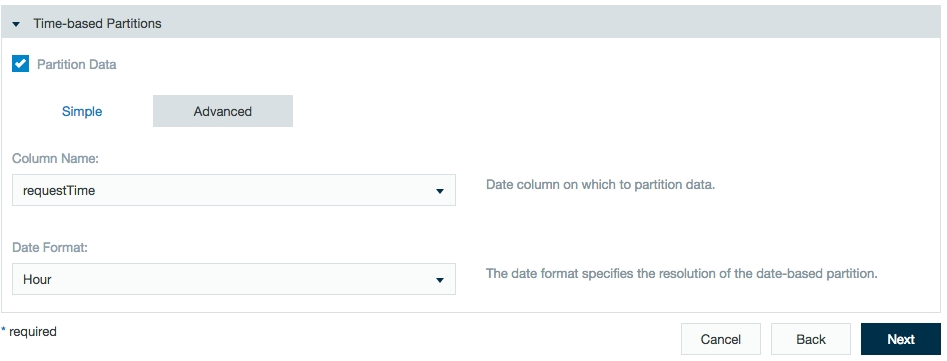
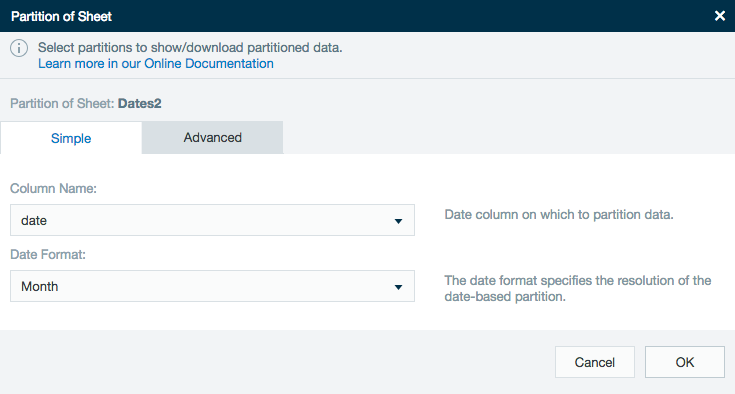
Simple partition filter
In Column Name choose a column that contains a date. In Date Format choose the time scale to use, so you can concentrate on only periods of years, months, days or hours.
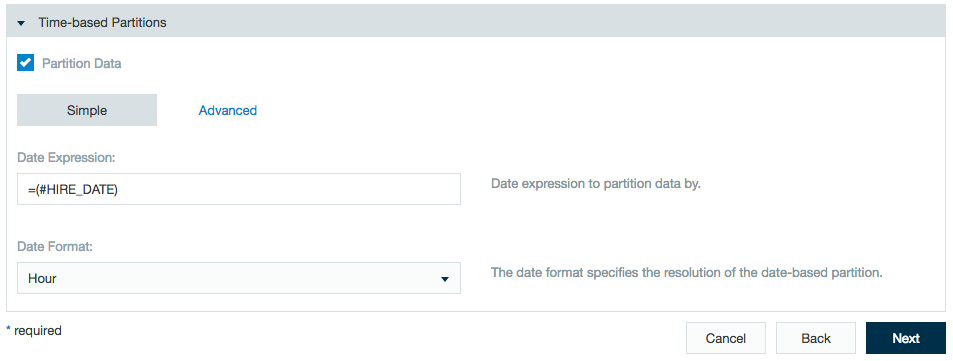
Advanced partition filter
With the advanced tab, you can enter a formula to represent the partitions. This especially useful when you don't have one column containing dates, rather the date is split into more than one column.
ASDATE(CONCAT(#Year;"-";#Month;"-";#Day;" ";#Hour;":";#Minute;":";#Second);"yyyy-MM-dd HH:mm:ss")
Partitioning Data Links
To create partitions when linking data:
- Create a new data link or choose to edit a current data link.
- Go to the Data Details section.
Enter the path for the files or folders and include the %pattern% to specify where the files are located.
The %pattern% specifies a folder structure and defines which files from the included folders should be included in the data link partition. This feature cannot be used on direct file names.
For example, instead of using
/data/archive/newsvine/Newsvine_Users_20140104.txt, you can usenewsvine/%pattern%when the path prefix is set to/data/archive.More examples:
 /Users/MattSmith/Desktop/Geo_coords/%pattern%/geodata.csv
 /Users/MattSmith/Desktop/Geo_coords/%pattern%.csv)
You can also include a / (slash) character to be able to distinguish different folder names for the different components of the date partition.
Additionally, a fixed character set can be included inside ' (single quotes).Examples:
/user/database/date=20150101/data.txt
becomes File or Folder value: user/database/date=%pattern%/*
Partition field: yyyyMMdd
For a particular folder structure:
/user/database/db_date_yr=2015/db_date_mo=01/data.txt
becomes File or Folder value: user/database/db_date_yr=%pattern%/*
Partition field: yyyy/'db_date_mo='MM
Or File or Folder value: user/database/%pattern%/*
Partition field: 'db_date_yr='yyyy/'db_date_mo='MM
To partition all files in a single folder where the file names contains the metadata:
/user/database/data-2015-01-01-version1.txt
use File or Folder value: /user/database/data-%pattern%-version*.csv
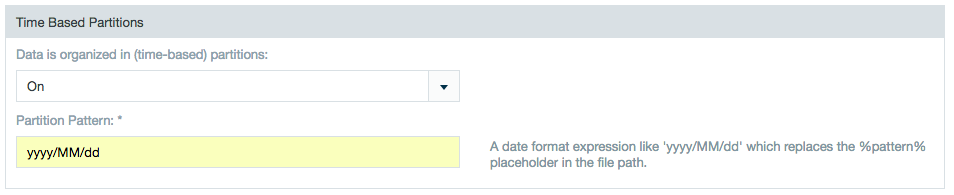
Partition field: yyyy''MM''dd- Scroll down to time based partitions and select the ON setting.
In the Partition Pattern box enter a date format expression like 'yyyy/MM/dd/HH/mm/SS' which will replaces the %pattern% placeholder in the file path. In the above example, you would use
'Newsvine_Users_'yyyMMdd'.txt'.Keep the following points in mind when determining granularity:
- The selected granularity of a partition can affect the performance of downstream workbooks.
- If the defined partitions contain few records, job performance might be slow in downstream workbooks.
- Using a granularity of minutes or seconds can cause the simple partition filter to be unreadable. Datameer X recommends only using these partition granularities with the time window and advanced partition filter.
- Using a granularity of minutes or seconds is not available for import jobs.
- Click Next when you have finished and save the file.
Using Partitioned Data in Workbooks
After partitioning your data during an import or file upload, open this data in a workbook.
Static and dynamic partitions
Static partition parameters have a set value(s) that won't change. Available from the simple and time window partition filters.
Dynamic partition parameters have the ability to change the partition values. Only available in the Advanced filter.
Simple partition filter
When you first load your partitioned data into a workbook, you will see a sunburst graph representing the time period partitions in your data. You must select at least one partition to use before you can work with your data.
In the example below, the outside ring represents days, the middle ring represents months, and the inner ring represents years. Click on a ring to choose it, or double-click to zoom in. You can also use shift+click to select a range of partitions, select all the partitions by clicking in the center of the graph or on the Select All button. 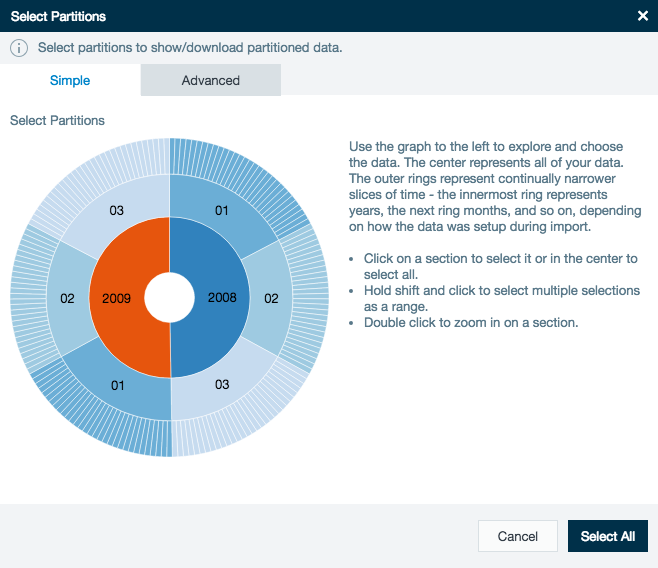
Advanced partition filter
There is also an Advanced partition filter where you must use a formula to specify which partition should be returned.
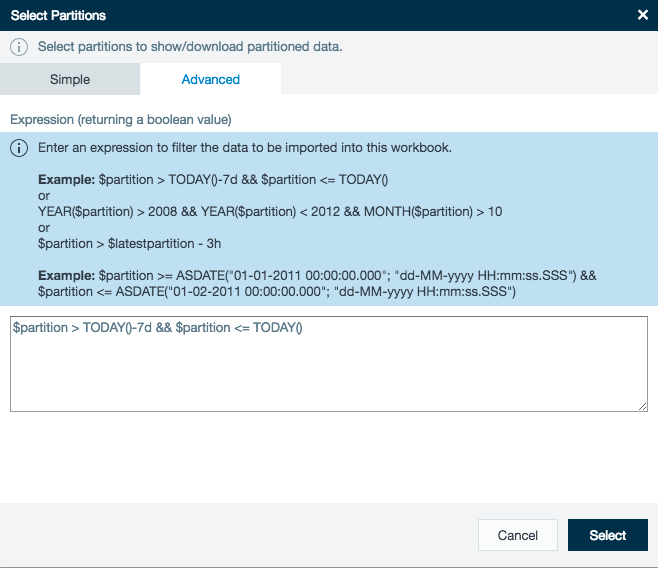
Here is an example of a formula returning the partitions representing the past seven days along with the partition for the current day:
(Note that this formula does not take into account the possibility of daylight saving changes that would cause a day to have 23 or 25 hours.)
$partition > TODAY()-7d && $partition <= TODAY()
This second example is a formula returning the partitions representing the past seven days and the partition for the current day that does respect daylight saving time:
$partition > ADDTODATE(TODAY();"-7d") && $partition <= TODAY()
The formula below returns the partitions representing yesterday, respecting daylight saving:
$partition == ADDTODATE(TODAY();"-1d")
To capture the last seven days of the previous month in a workbook, you would use a formula that respects daylight saving time:
$partition < ENDOFMONTH(STARTOFMONTH(ADDTODATE(TODAY();"-1M"))) && $partition >= ENDOFMONTH(STARTOFMONTH(ADDTODATE(TODAY();"-1M")))-7d
Understanding the $partition variable for different partition resolutions
When a partition is created in Datameer X for an import job or data link, there are four different partition resolutions that can be configured: YEAR, MONTH, DAY, or HOUR. The $partition variable is a <date type> object in Datameer. This variable is set to the start of the partition window. Depending on the resolution of the partitions, the $partition variable takes on different date field type values.
For example, suppose that Apache log data is being imported from July 4, 2014 22:00:00 until July 4, 2014 22:59:59. The following table describes how an import job partitions data for each possible resolution. Additionally it describes what the corresponding $partition variable is for this data set:
| Partition resolution | Partition range (inclusive) | $partition variable value |
|---|---|---|
| YEAR | January 1, 2014 00:00:00 - December 31, 2014 23:59:59 | January 1, 2014 00:00:00 |
| MONTH | July 1, 2014 00:00:00 - July 31, 2014 23:59:59 | July 1, 2014 00:00:00 |
| DAY | July 4, 2014 00:00:00 - July 4, 2014 23:59:59 | July 4, 2014 00:00:00 |
| HOUR | July 4, 2014 22:00:00 - July 4, 2014 22:59:59 | July 4, 2014 22:00:00 |
The $lastpartition variable
Another variable is available for use when defining an advanced filter for partitions in a workbook. This variable, $latestpartition, represents the most recent partition that contains data.
$partition == $latestpartition
Exporting Partitioned Data
It is also possible to export only the desired partition or partitions during export.
Simple partition filter
During export you can choose to export only certain partitions.
The simple table has drop-down menus so you can select the column name that is partitioned and the time format how to partition the data.
Advanced partition filter
There is also an advanced partition filter. Here just enter a formula to signify which partition should be exported.
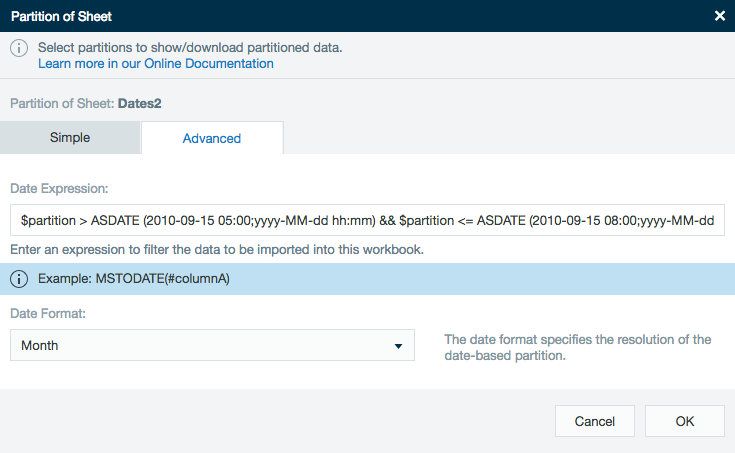
Here is an example formula showing how to export data from 15 Sep 2010 between 5:00 AM and 8:00 AM:
$partition > ASDATE (2010-09-15 05:00;yyyy-MM-dd hh:mm) && $partition <= ASDATE (2010-09-15 08:00;yyyy-MM-dd hh:mm)
Repartitioning
After a partition has been configured it may be necessary to change the partition's resolution. You can change the resolution for import jobs and file uploads. Changing the resolution requires a few simple steps.
- Highlight and right-click the partitioned import job or file upload and click Edit.
- Click Next until you reach Define Fields.
- Under Time-based partitions you can then change the resolution, as you would upon initial import.
- After choosing the desired resolution, click Next until you reach the final screen and save the repartitioning.
The repartitioning process runs automatically and as long as the resolution is more granular, all workbooks are updated automatically. If the resolution has become less granular, then you will be prompted to choose partitions again when opening an existing workbook.
If a running repartitioning is aborted, just process the import job or file upload again. As long as the job configuration has been saved, then you need to restart the repartitioning job.
Repartitioning and migration jobs
If you are repartitioning data from a migration job, it can affect resources on your cluster and use extra disk space. The repartitioning leaves the existing data alone until the migration job is finished and housekeeping executes. The data takes up at least twice what it currently does after the migration has run and housekeeping hasn't. Datameer's partitioning logic always performs dynamic-based partitioning and needs to read the records to write the partition files. Datameer X regenerates the samples, so there is a separate sample per partition, which requires Datameer X to read through the data. If you have a yearly migration job, you can make it run faster by partitioning by smaller amounts of time, such as a month or a day so more tasks can be run in parallel.
As of Datameer X 7.4